How to programmatically create a commit on GitHub using the GitHub API and API Hero
The GitHub REST API is a useful behemoth, currently sitting at 878 endpoints (by our count) and growing. It contains all sorts of useful functionality, from searching for code to rendering markdown, and then some.
You can also use it to interact with the raw git repository to read and modify the actual underlying data. One very useful thing you can do is create a new commit, but it's not exactly a straightforward POST /commit call. It helps if you understand a bit about how the git internals work, but for the following post we're going break it down step-by-step.
We're also going to show how using API Hero can save us time by using the GitHub integration, and getting nicely typed requests and responses, as well as the ability to view and debug request data.
What is API Hero?
Before we get started, if you aren't familiar with API Hero, you can quickly get up to speed with this 60 second explainer:
Setup your API Hero project
Before we can create our first commit programmatically, we need to setup the project with API Hero and add the GitHub integration. For this post, we'll use Node.js, and this GitHub repo that you can clone to follow along:
git clone https://github.com/apihero-run/apihero-github-commits.git
cd apihero-github-commits
npm install
Next we'll run the apihero CLI to add API Hero and the GitHub integration to our project:
npx apihero@latest add git
Here is what that would look like (although you may also be asked to authenticate to API Hero, which doesn't happen below):
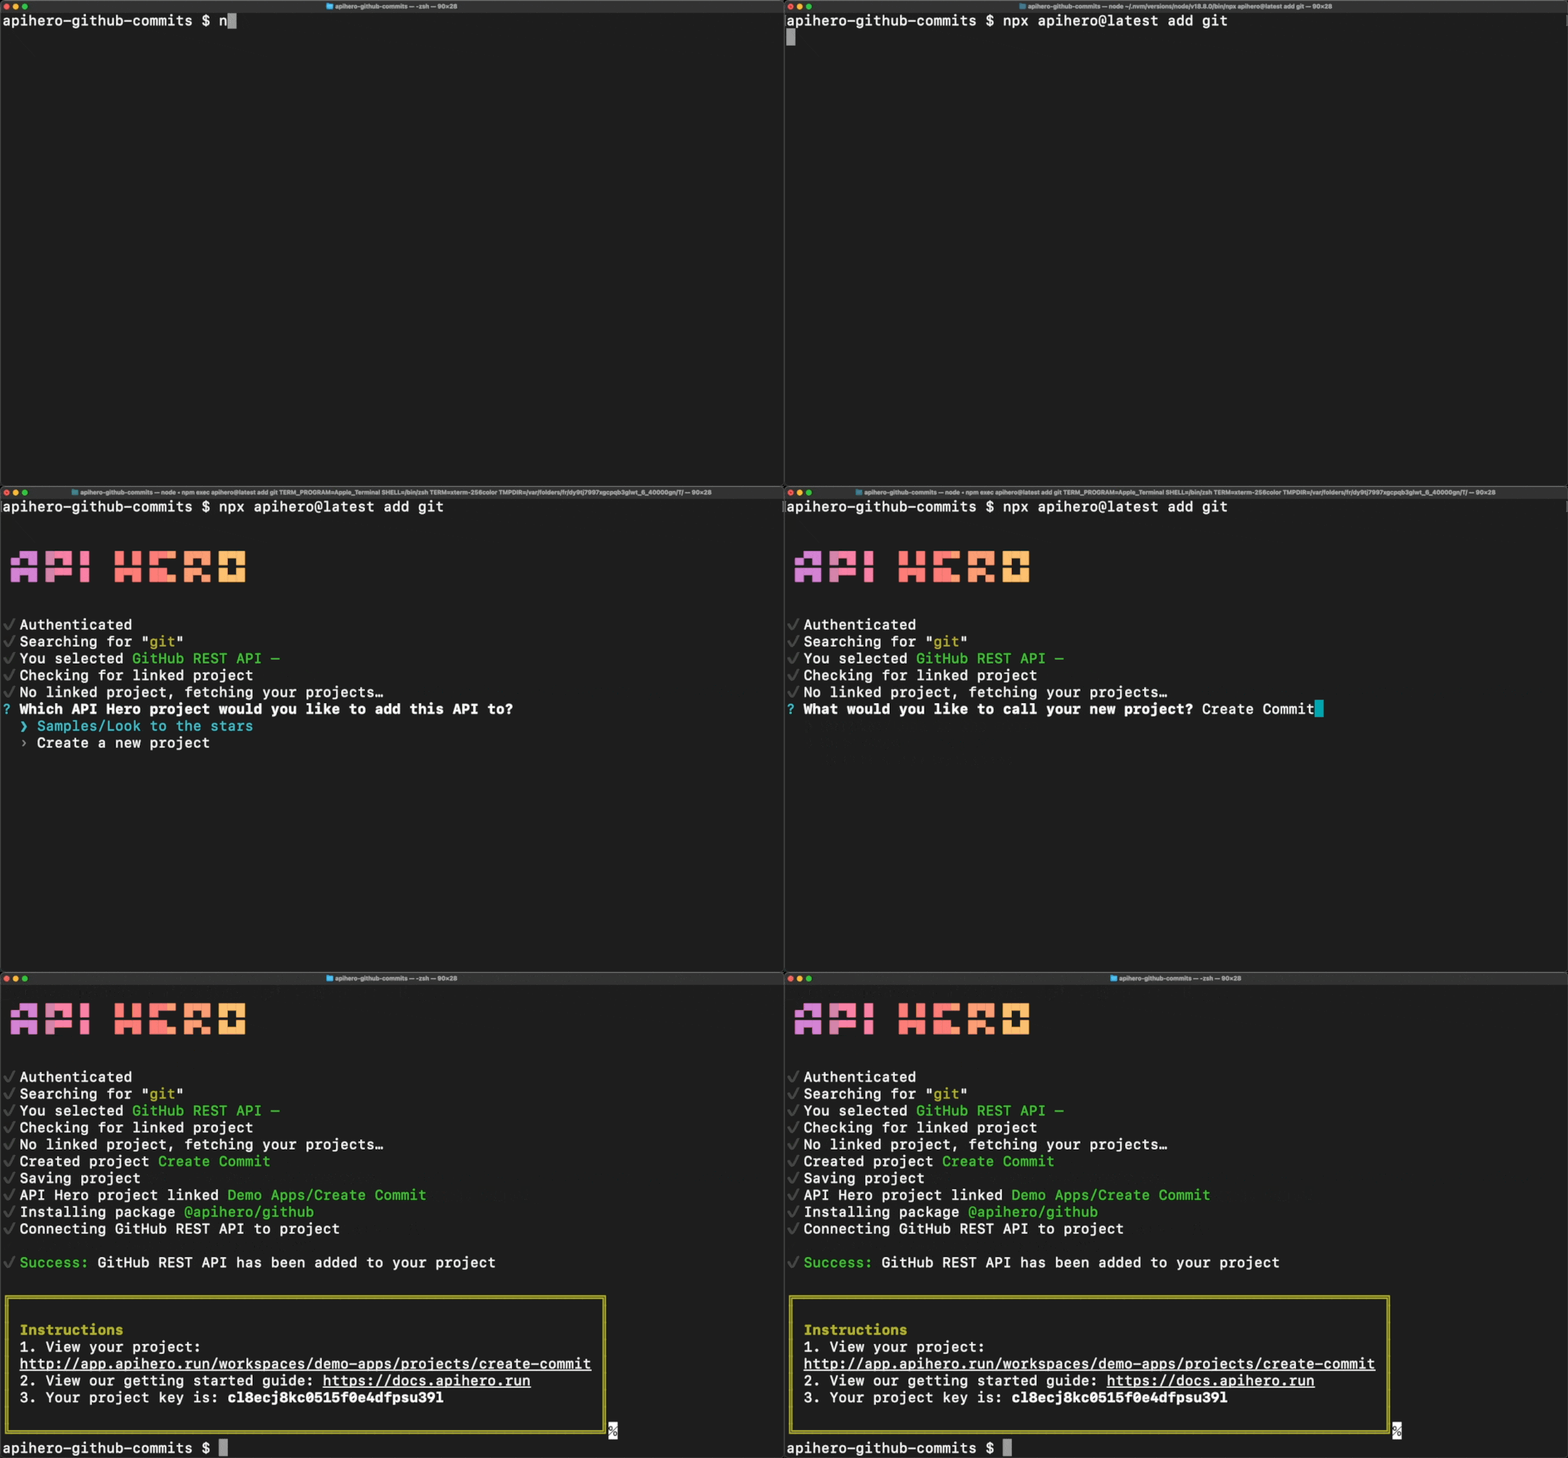
Next, copy the "project key" printed after running the previous command and create a .env file in the root of the repository with the following contents:
APIHERO_PROJECT_KEY="<your projectKey here>"
1. Fetch latest commit
The first request to the GitHub API that we need to make is to fetch the latest commit for the branch we want to commit to. We can do that by using the get a reference endpoint, passing in the owner, repo, and ref. For branches, the ref is in the format of heads/{branchName}.
Update the src/index.ts file with the following code:
import { git } from "@apihero/github";
import { fetchEndpoint } from "@apihero/node";

async function createCommit(owner: string, repo: string, branch: string) {
  const ref = await fetchEndpoint(git.getRef, {
    owner,
    repo,
    ref: `heads/${branch}`,
  });
}

createCommit("apihero-run", "apihero-github-commits", "commit-playground").catch(console.error);
As you can see we're defining the createCommit function and then calling it, passing in the apihero-github-commits repo. It's using the fetchEndpoint function from @apihero/node and the git.getRef endpoint from the @apihero/github client library.
Now run this code in the terminal like so:
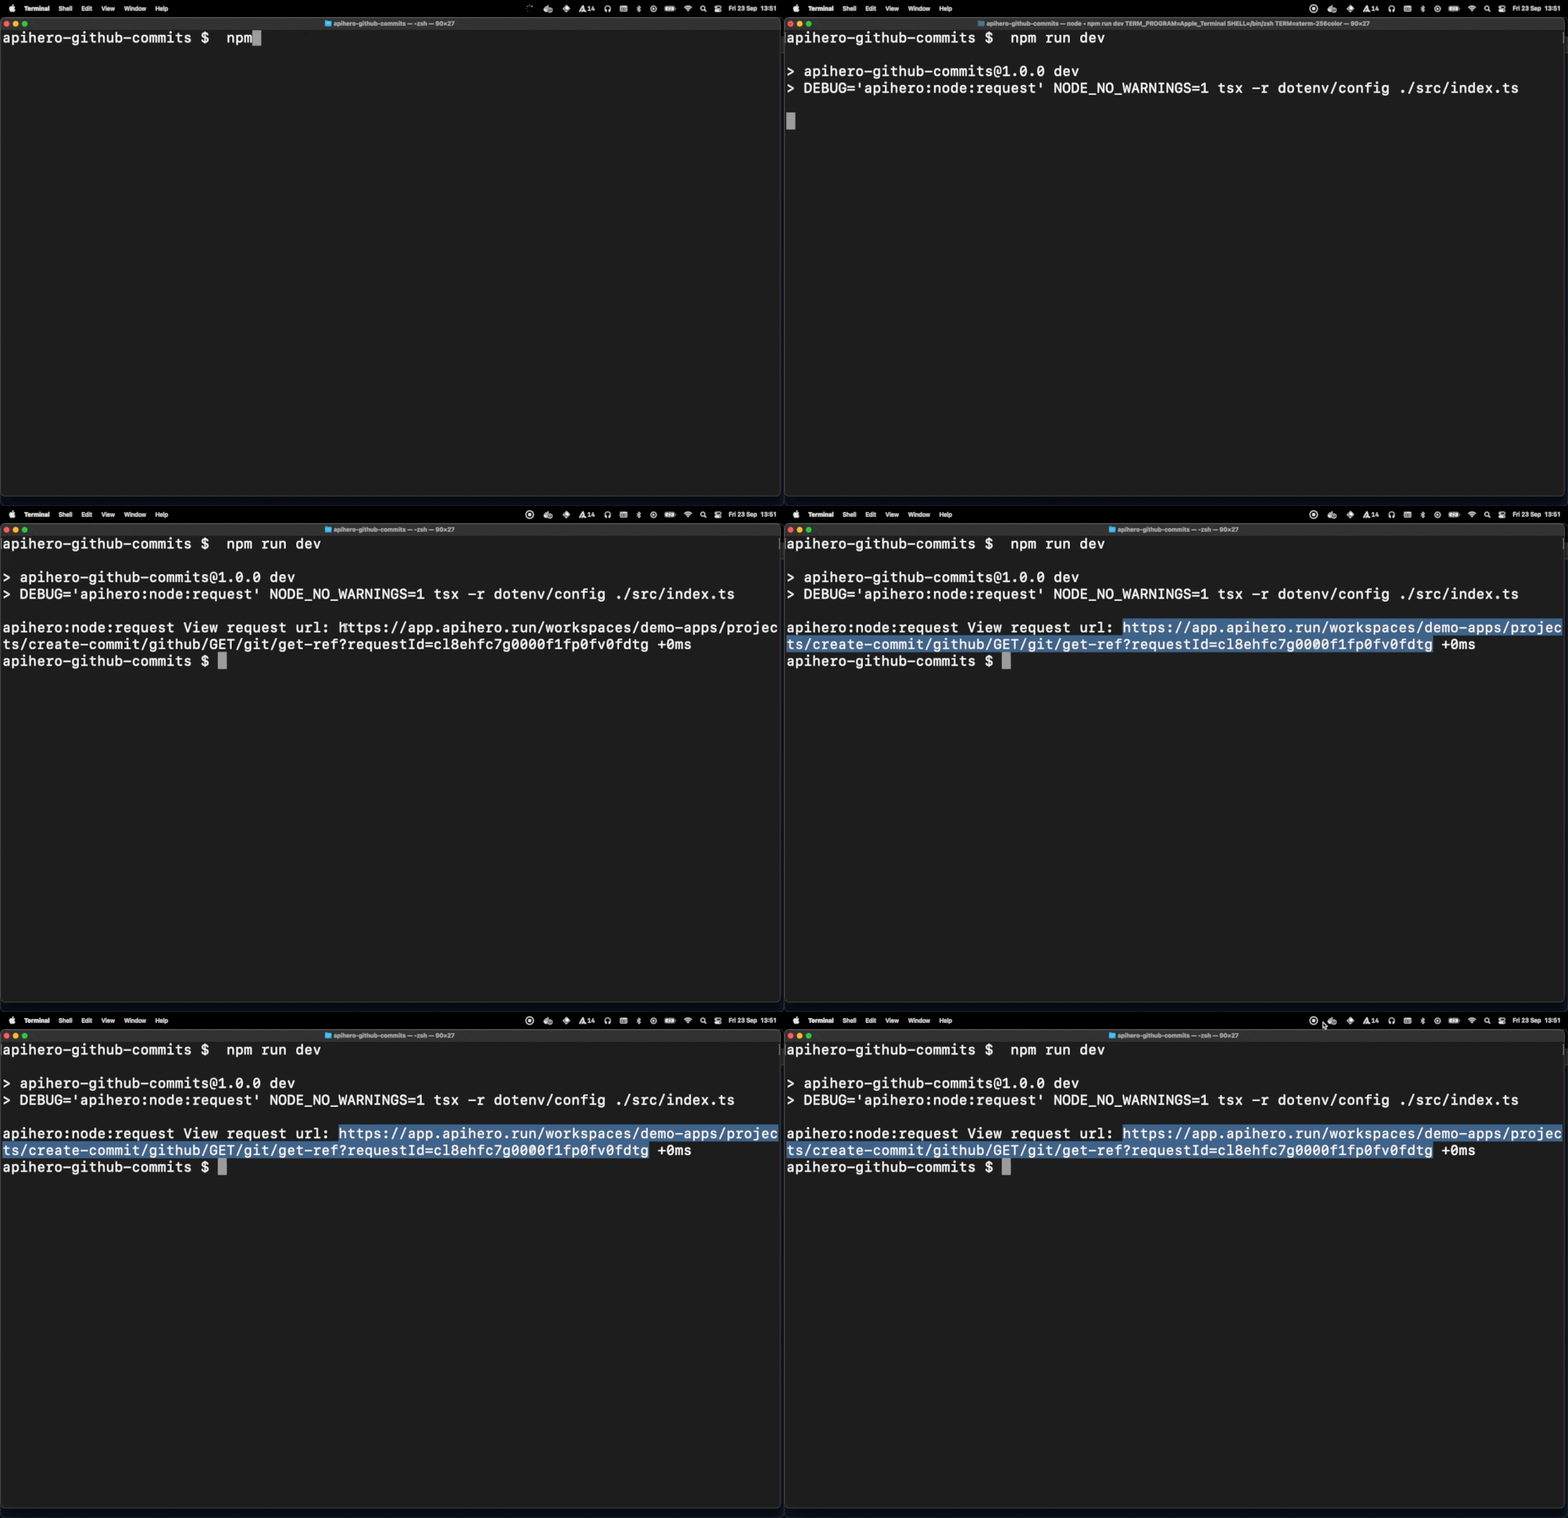
npm run dev
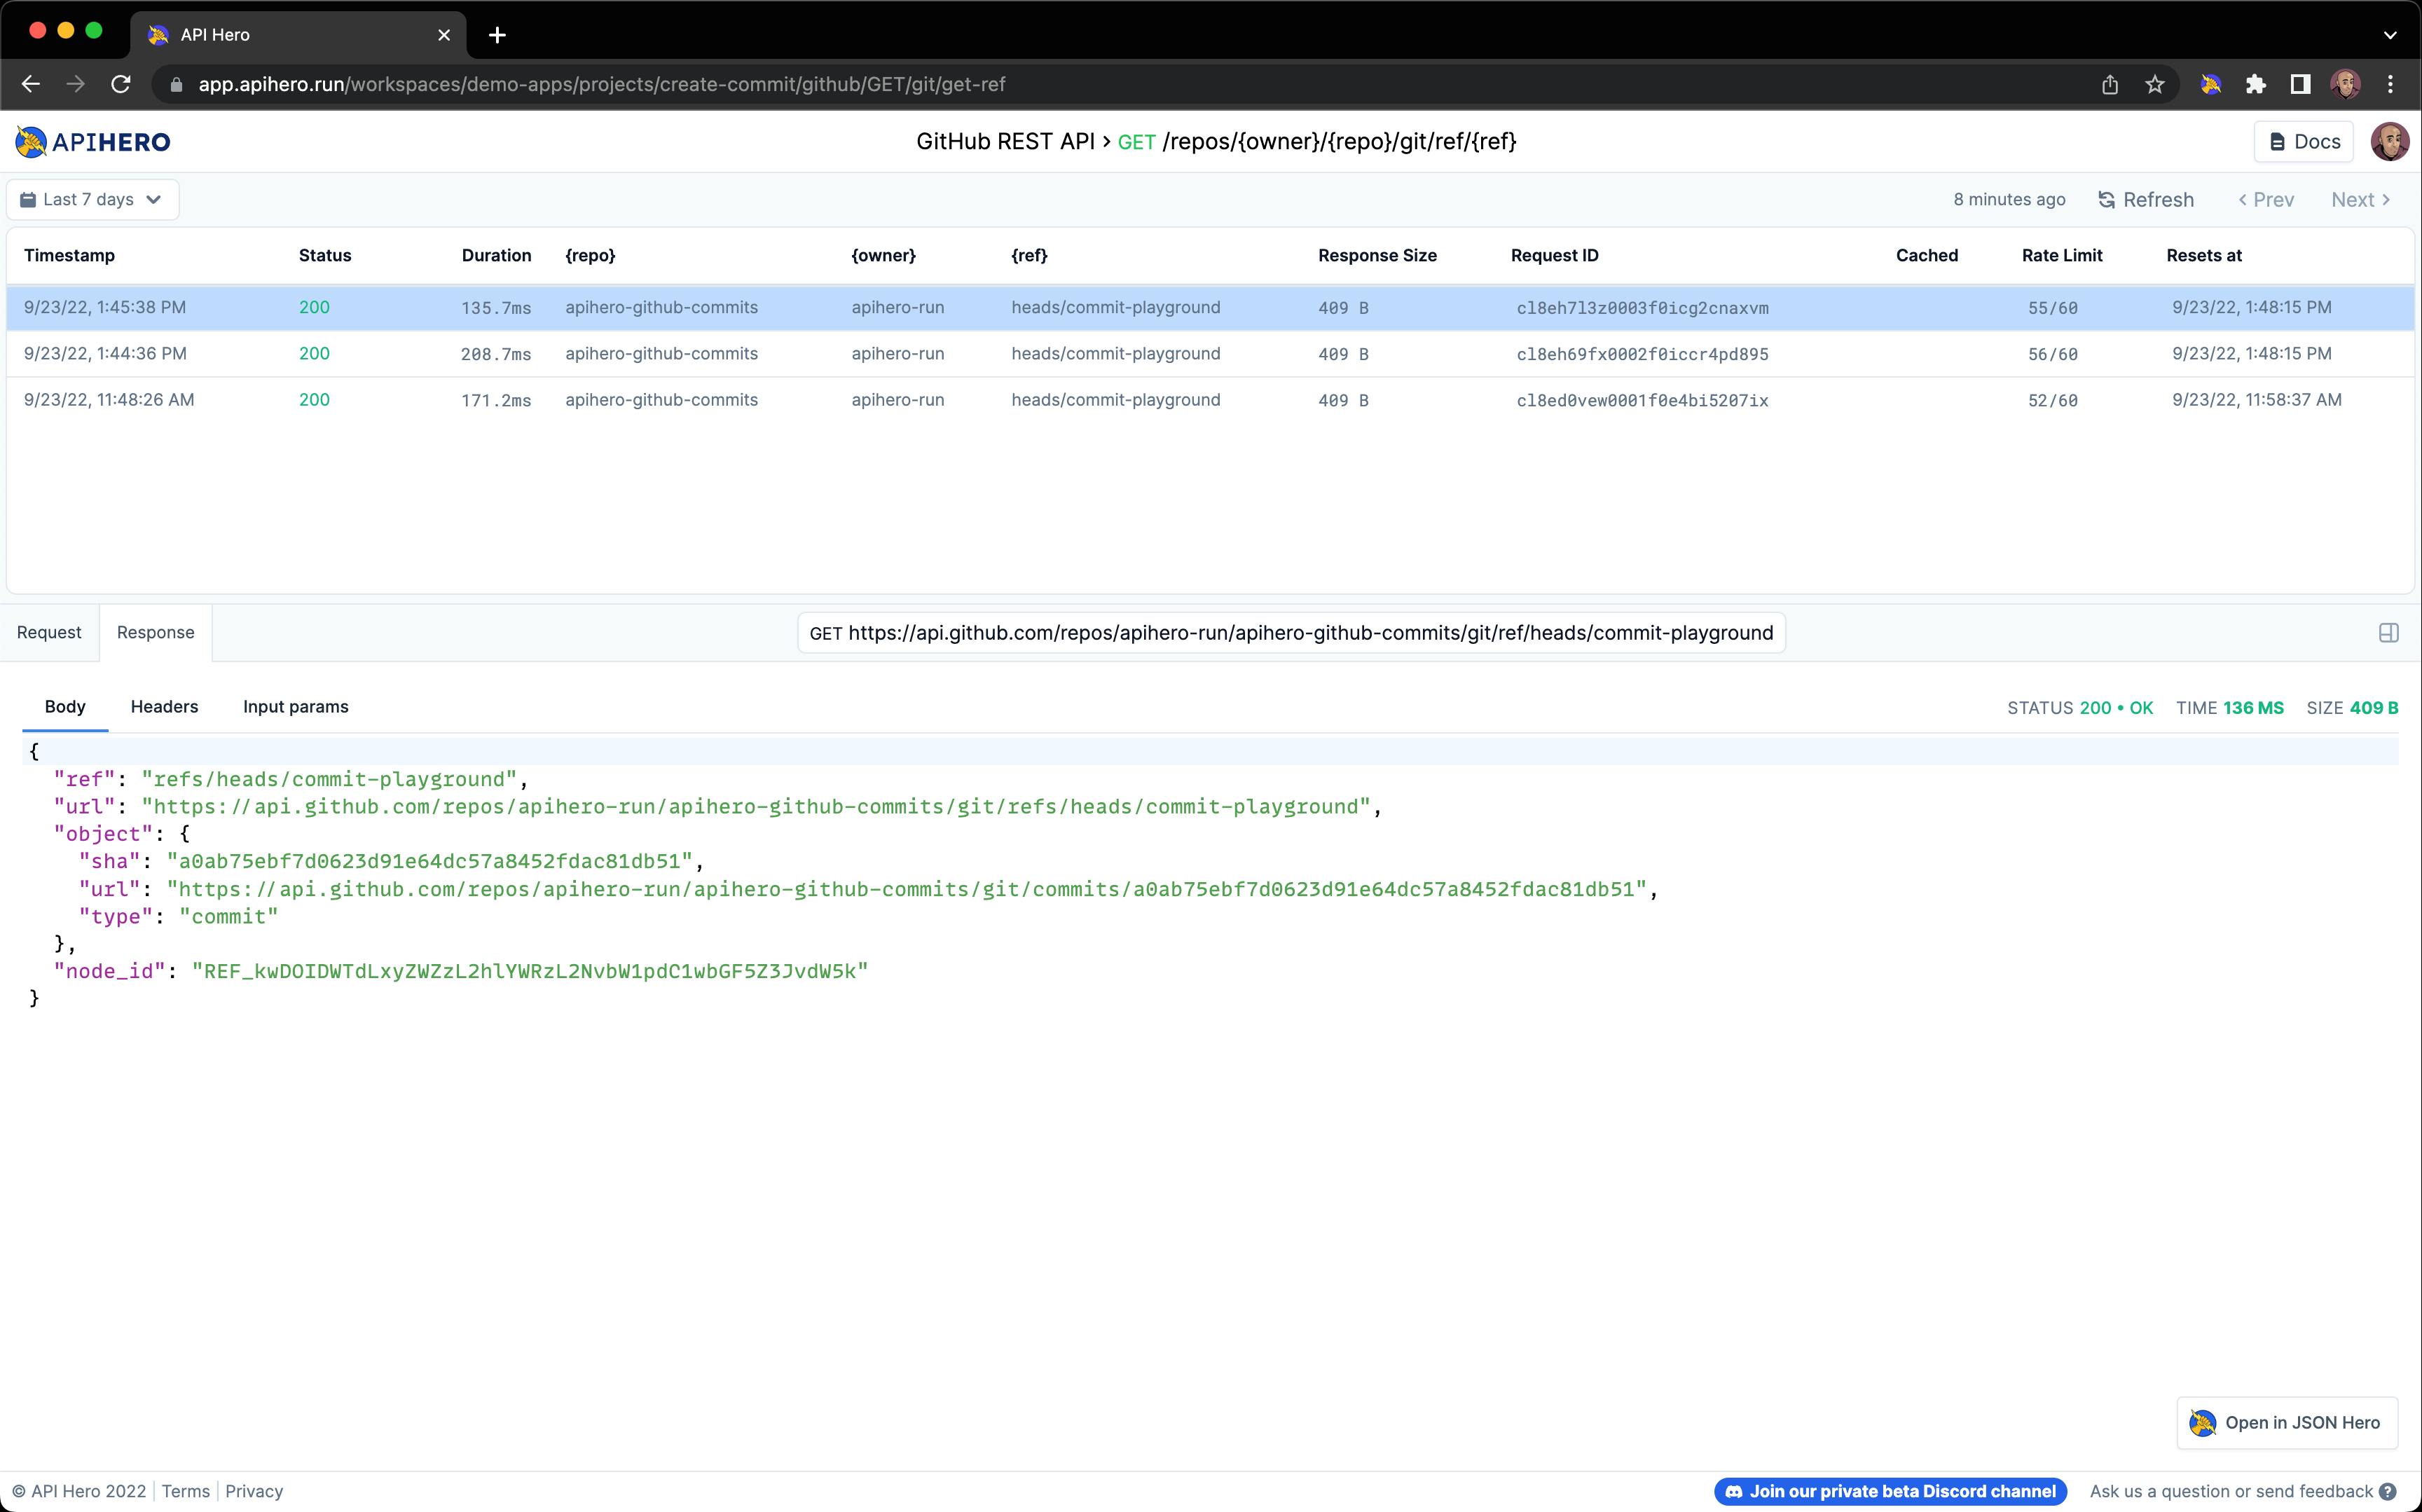
This runs the src/index.ts file using tsx. Notice how we aren't logging out the request or response above, or setting up a breakpoint to see what the request or response is. That's because we're using API Hero, and all that data is saved for us to inspect in your Request History. And our @apihero/node package will print out a link for you to use to jump right there, like so:
Visiting that link brings us to the request, where we can inspect the response body:
2. Create a commit tree
Next, we'll need to create a tree using the Create a tree endpoint. A git tree is the internal git object that defines the hierarchy between files in a git repository. Think of it as the list of files in a git repo, along with their "sha" hash identifier.
There are a few ways to do this using the "Create a tree", but the easiest is to just give a list of files and their contents for only the files we want to change.
We'll also need to set the "base" of this newly created tree to the sha of the latest commit in the branch, which we now have from our previous request:
async function createCommit(owner: string, repo: string, branch: string) {
  const ref = await fetchEndpoint(git.getRef, {
    owner,
    repo,
    ref: `heads/${branch}`,
  });

  if (ref.status === "error") {
    throw ref.error;
  }

  const commitTree = await fetchEndpoint(git.createTree, {
    owner,
    repo,
    tree: {
      tree: [],
      base_tree: ref.body.object.sha,
    },
  });
}
So far so good, but we still need to add content to the tree array to actually make any changes in this commit. If we hover over the git.createTree endpoint in VS Code, we can see what data is expected in the tree array:
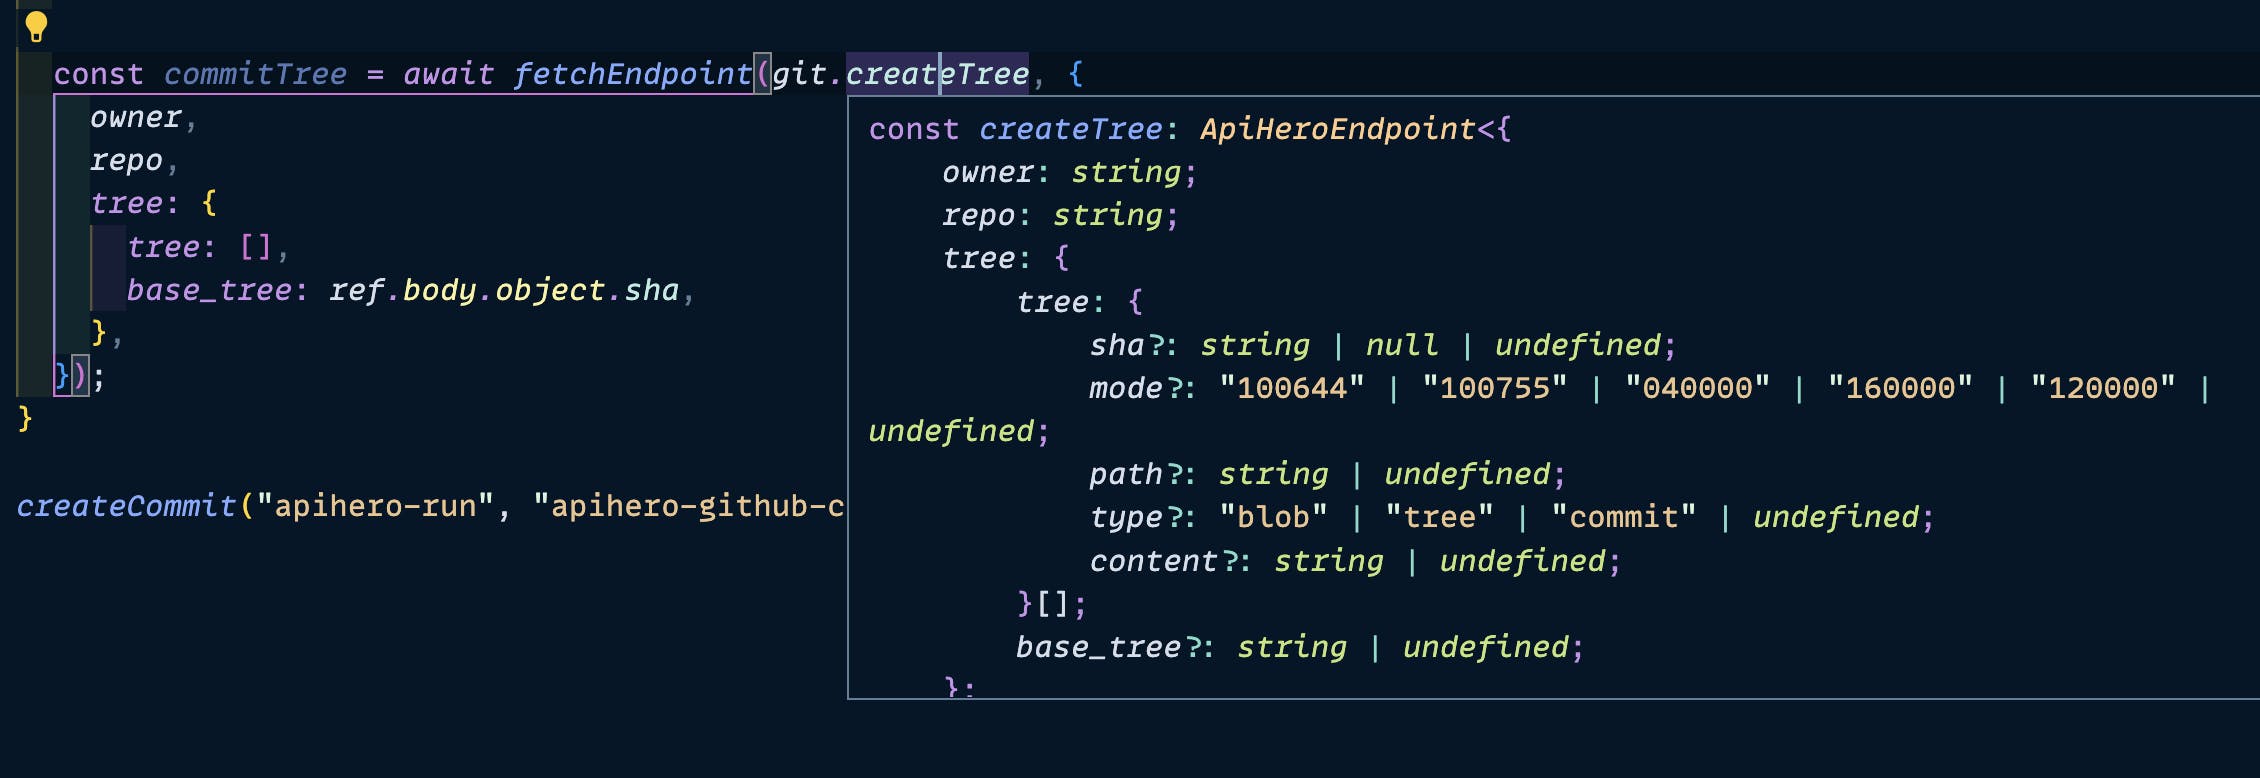
Writing out an example entry and then hovering over each property presents helpful documentation about each one:

Let's update the tree array with a new file based on the current datetime:
const commitTree = await fetchEndpoint(git.createTree, {
    owner,
    repo,
    tree: {
      tree: [
        {
          path: `playground/${Date.now()}.txt`,
          mode: "100644",
          type: "blob",
          content: `The time is ${(new Date()).toISOString()}`,
        },
      ],
      base_tree: ref.body.object.sha,
    },
  });
Now let's run npm run dev again and inspect the request to view the response data:
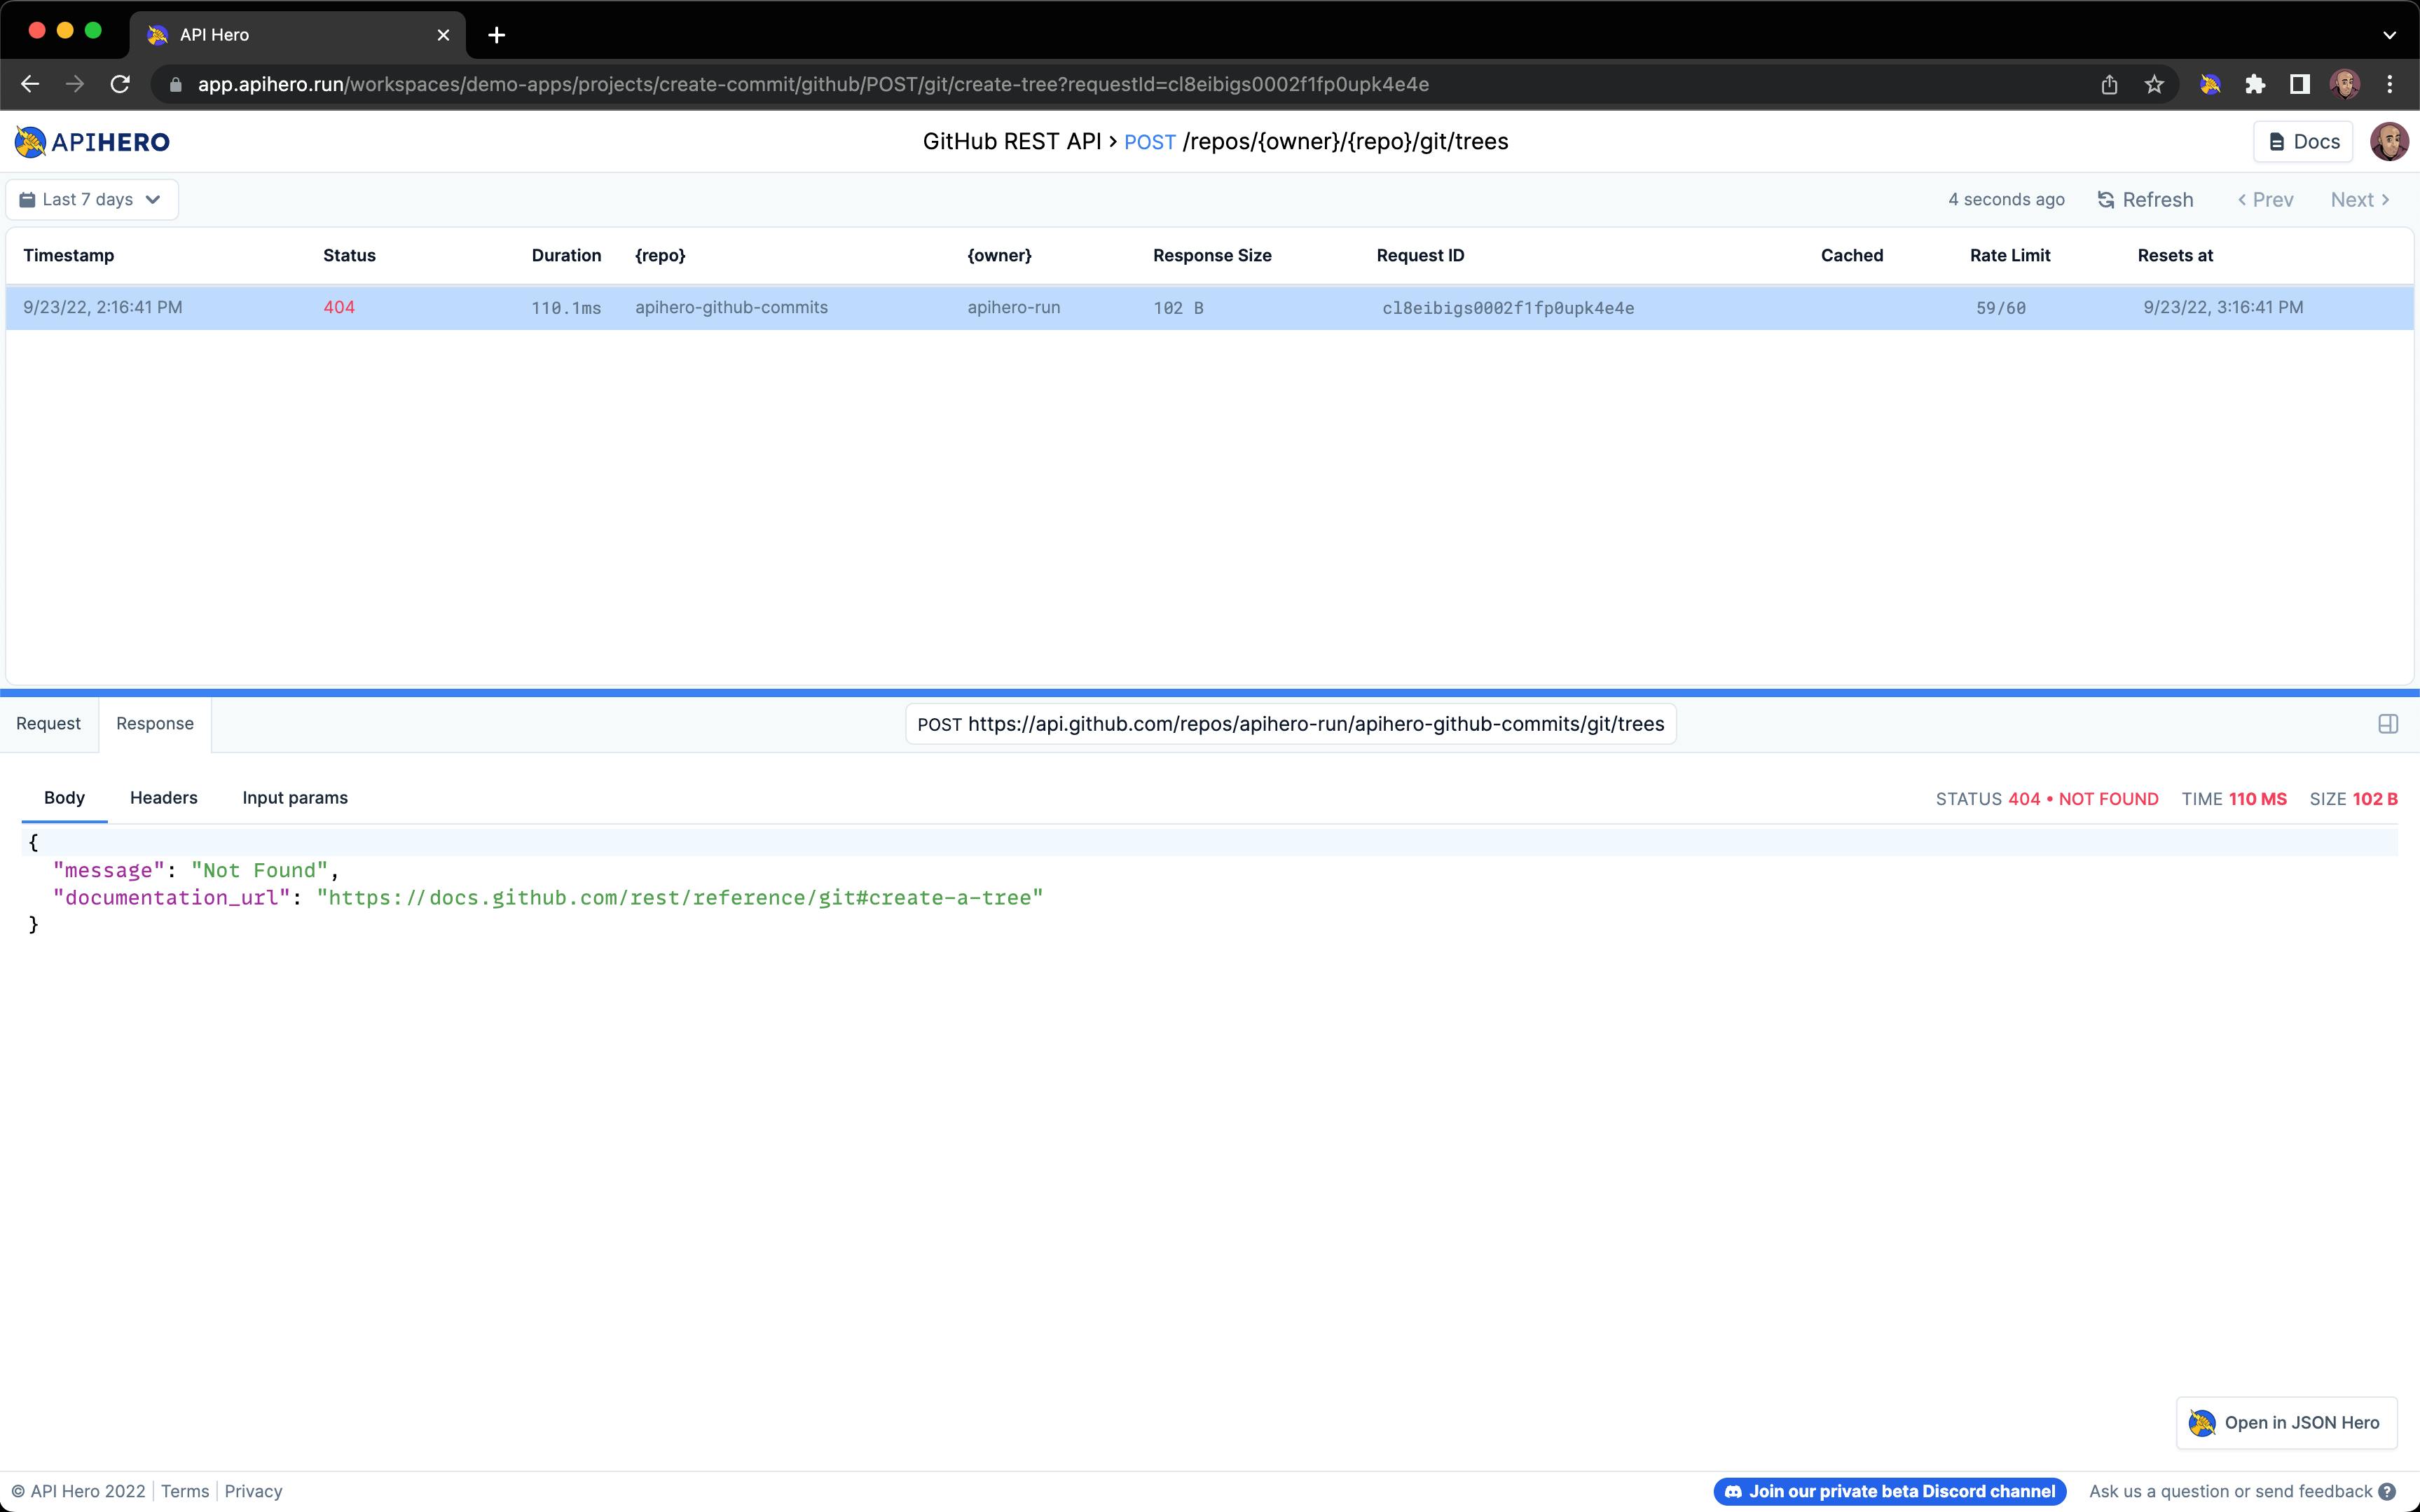
Oops, looks like something went wrong. Usually with the GitHub API, receiving a 404 status means either we fat fingered the repo name, or we're trying to perform an authorized request but haven't added any authorization info to the request.
If we navigate to our project dashboard, we can easily add authentication in API Hero, without having to change anything in our code:
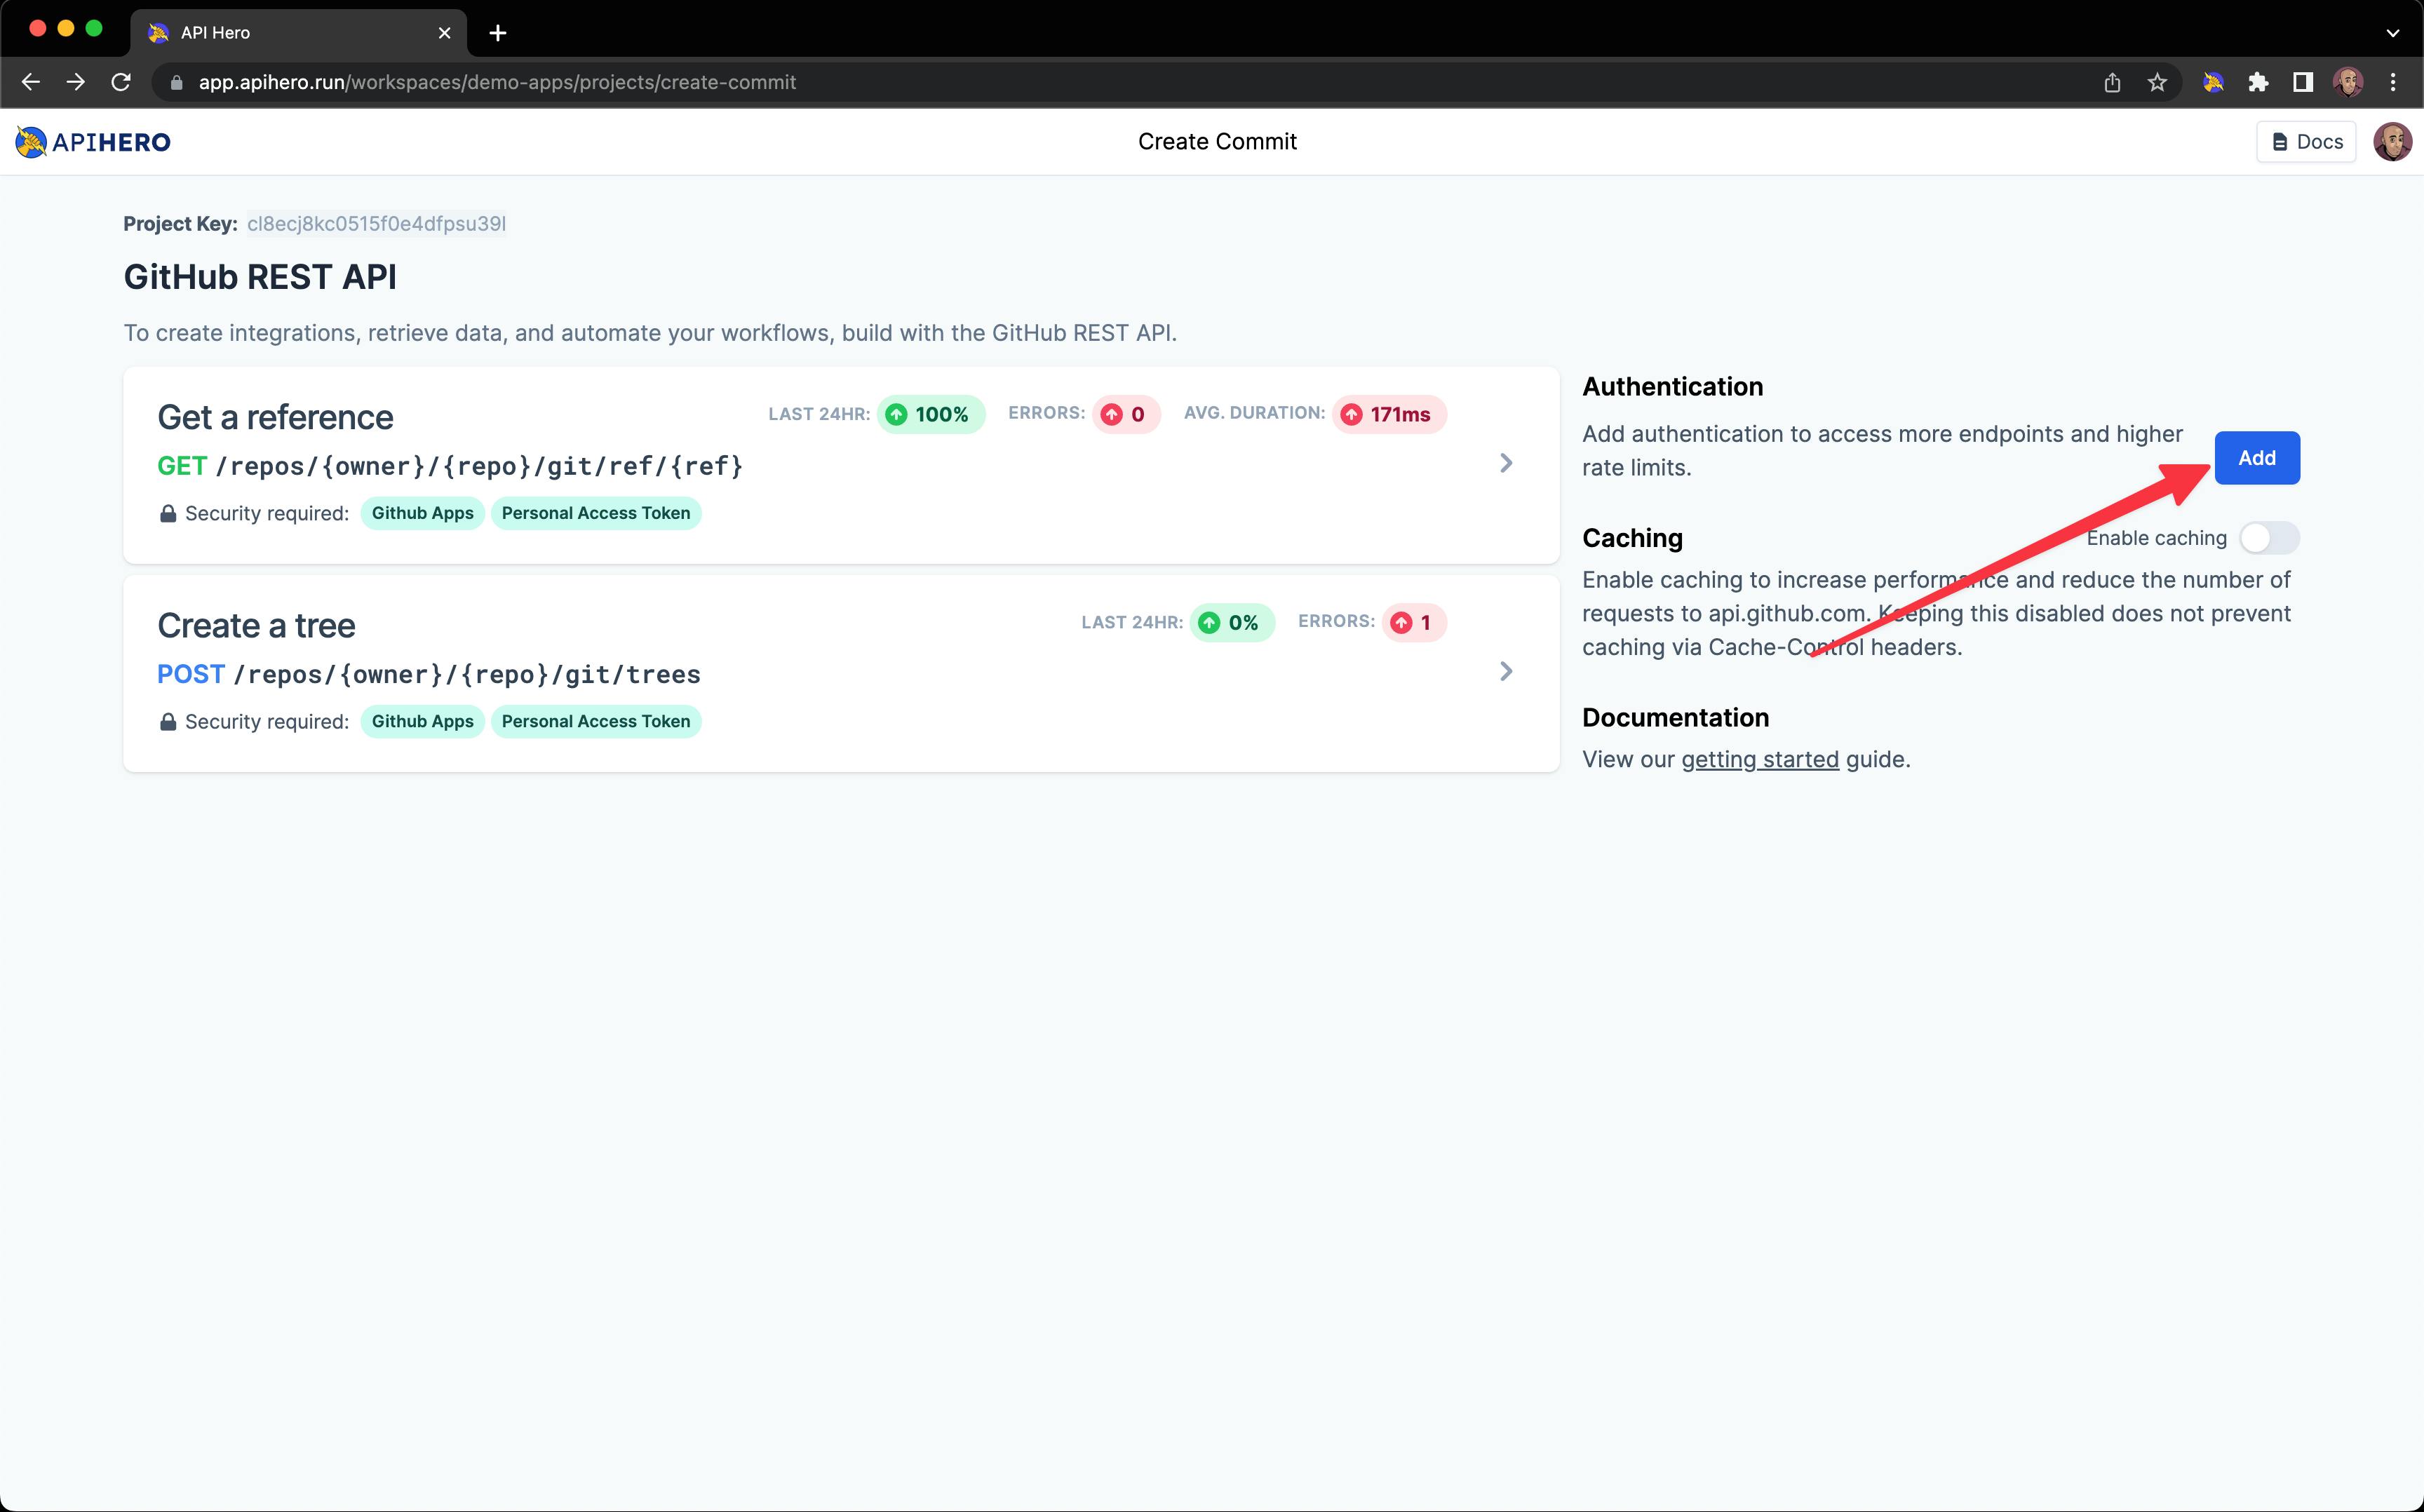
Let's use the Personal Access Token authentication strategy to make requests as ourself . Follow the directions here for creating a PAT in GitHub, and then add your GitHub username as the username and the PAT as the password, like so:
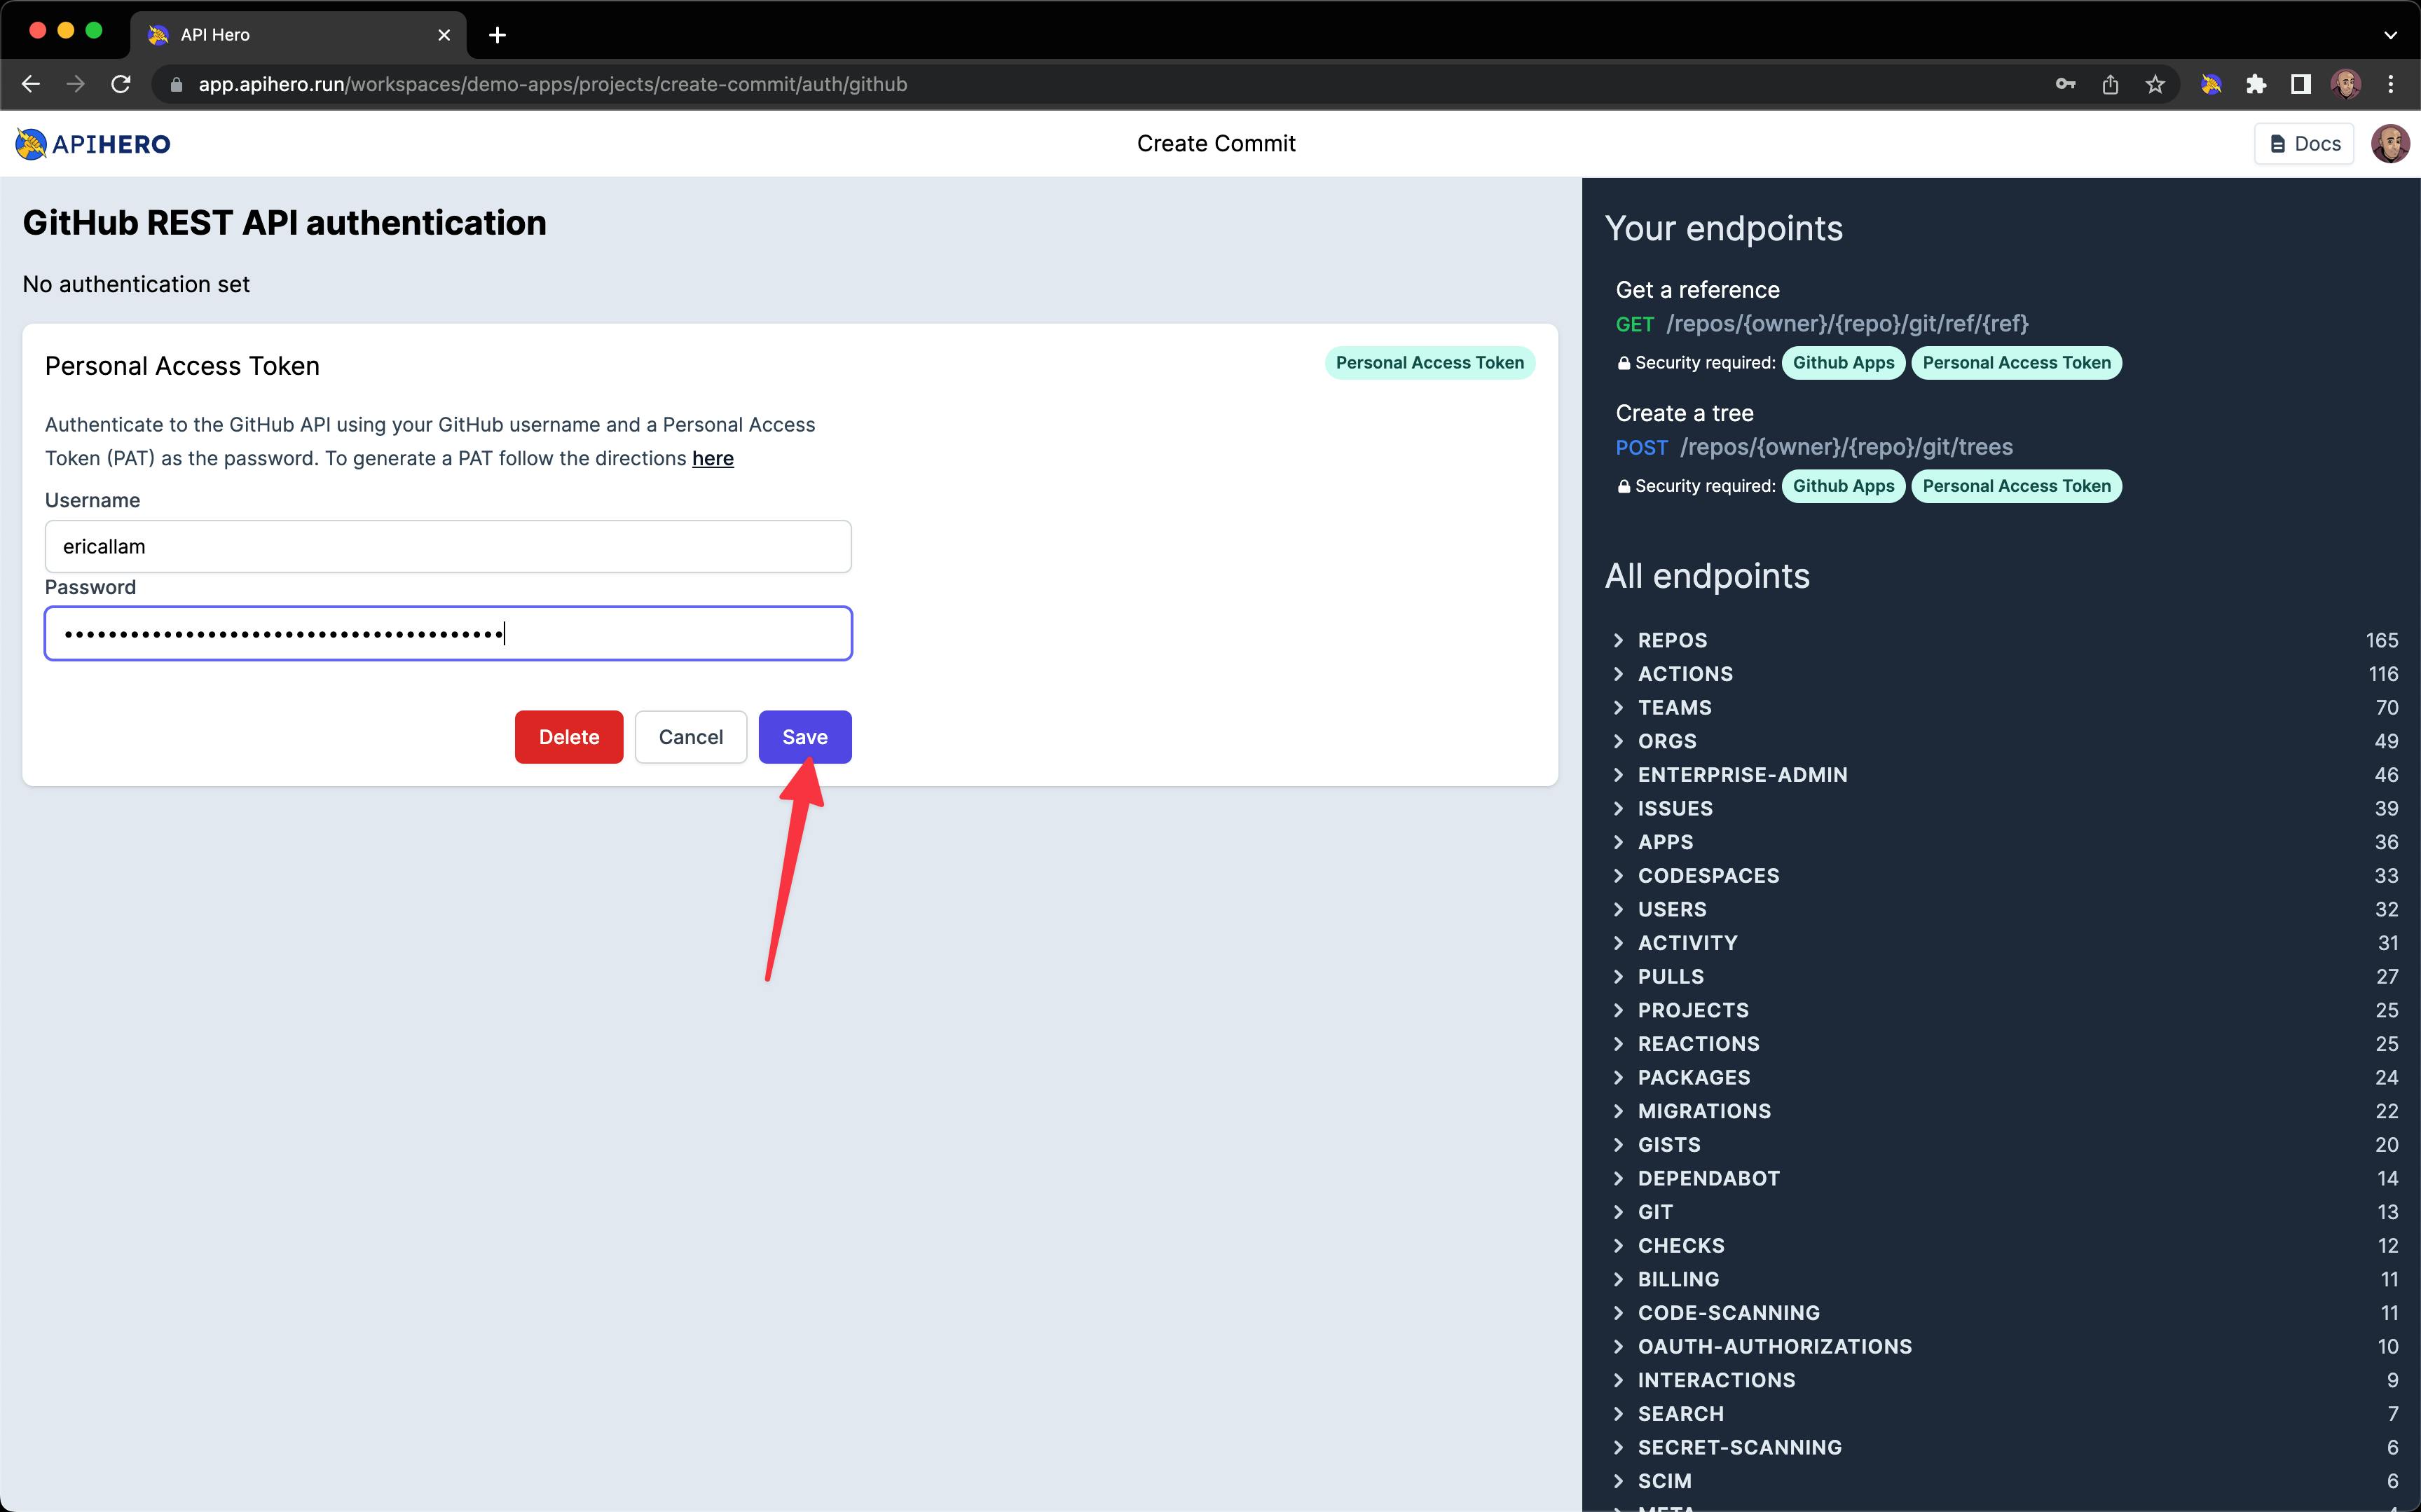
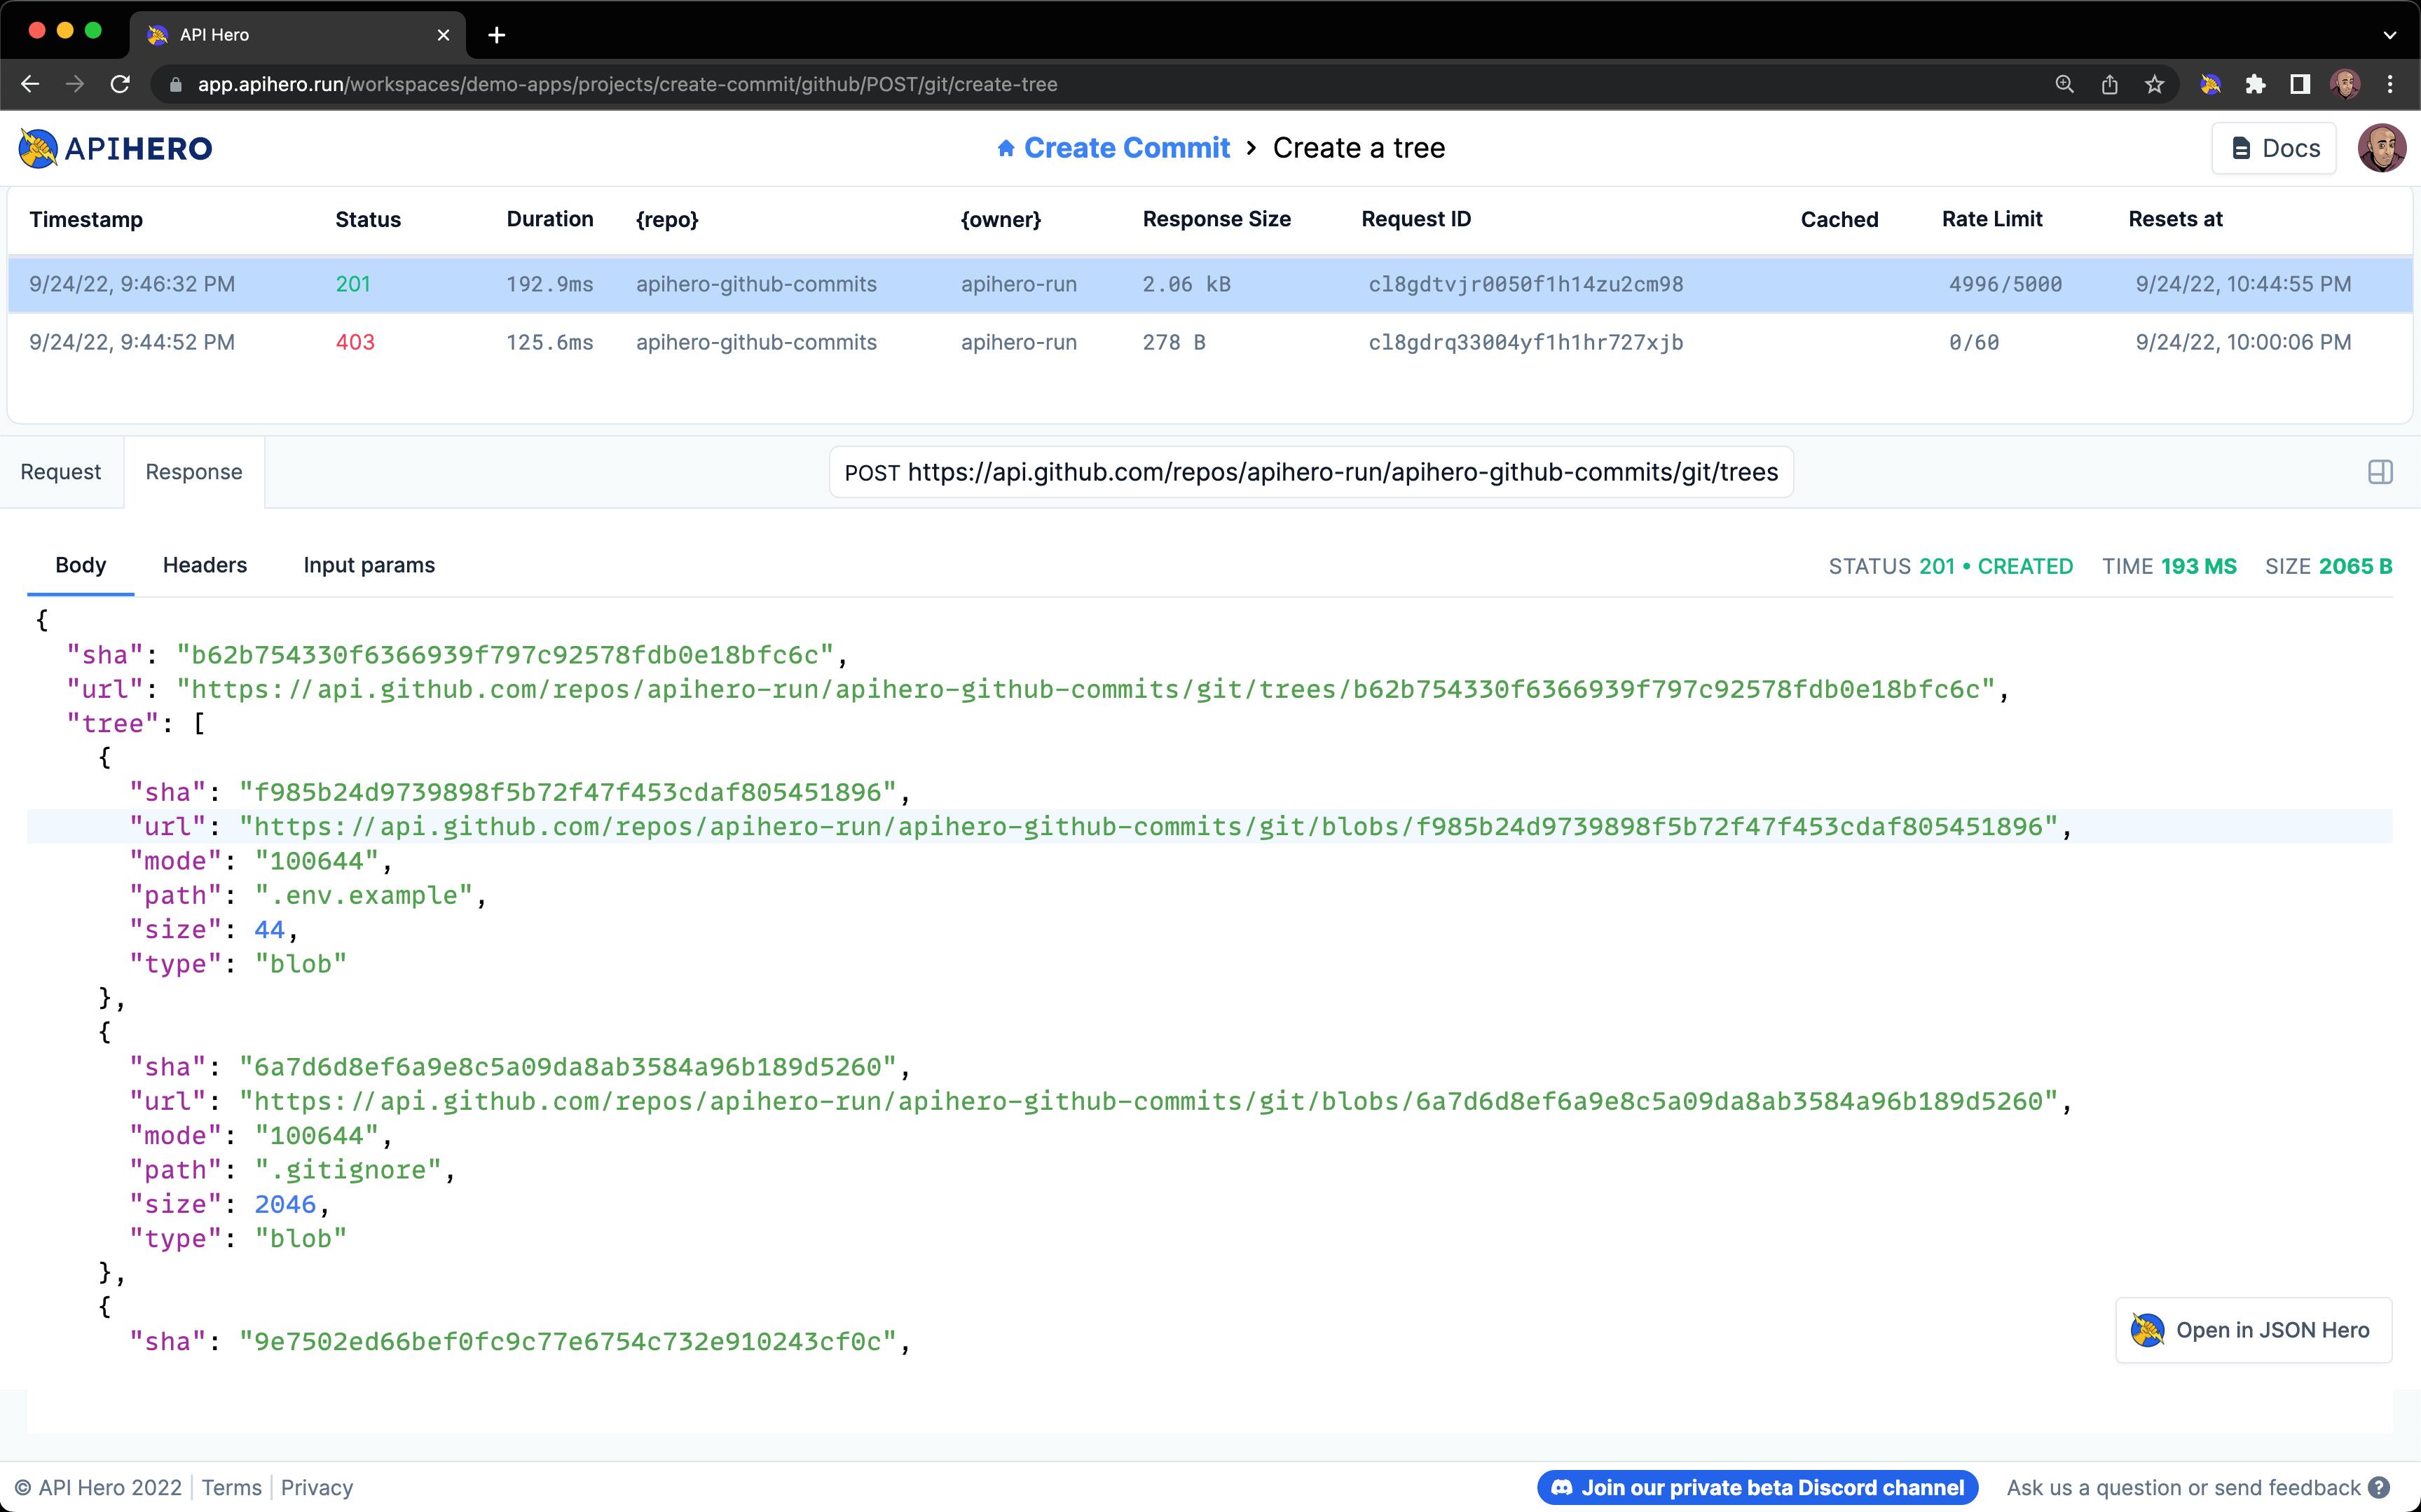
After hitting save, we can run npm run dev again and head back to the Request History page in API Hero and we should now see a 201 response:
3. Create a commit
Okay, now that we've created the tree content of the commit, it's time to actually create the commit itself, with a message, the commit tree, and a reference to the commit's parent:
async function createCommit(owner: string, repo: string, branch: string) {
  const ref = await fetchEndpoint(git.getRef, {
    owner,
    repo,
    ref: `heads/${branch}`,
  });

  if (ref.status === "error") {
    throw ref.error;
  }

  const commitTree = await fetchEndpoint(git.createTree, {
    owner,
    repo,
    tree: {
      tree: [
        {
          path: `playground/${Date.now()}.txt`,
          mode: "100644",
          type: "blob",
          content: `The time is ${new Date().toISOString()}`,
        },
      ],
      base_tree: ref.body.object.sha,
    },
  });

  if (commitTree.status === "error") {
    throw commitTree.error;
  }

  const commit = await fetchEndpoint(git.createCommit, {
    owner,
    repo,
    commit: {
      message: "Create a new file",
      tree: commitTree.body.sha,
      parents: [ref.body.object.sha],
    },
  });
}
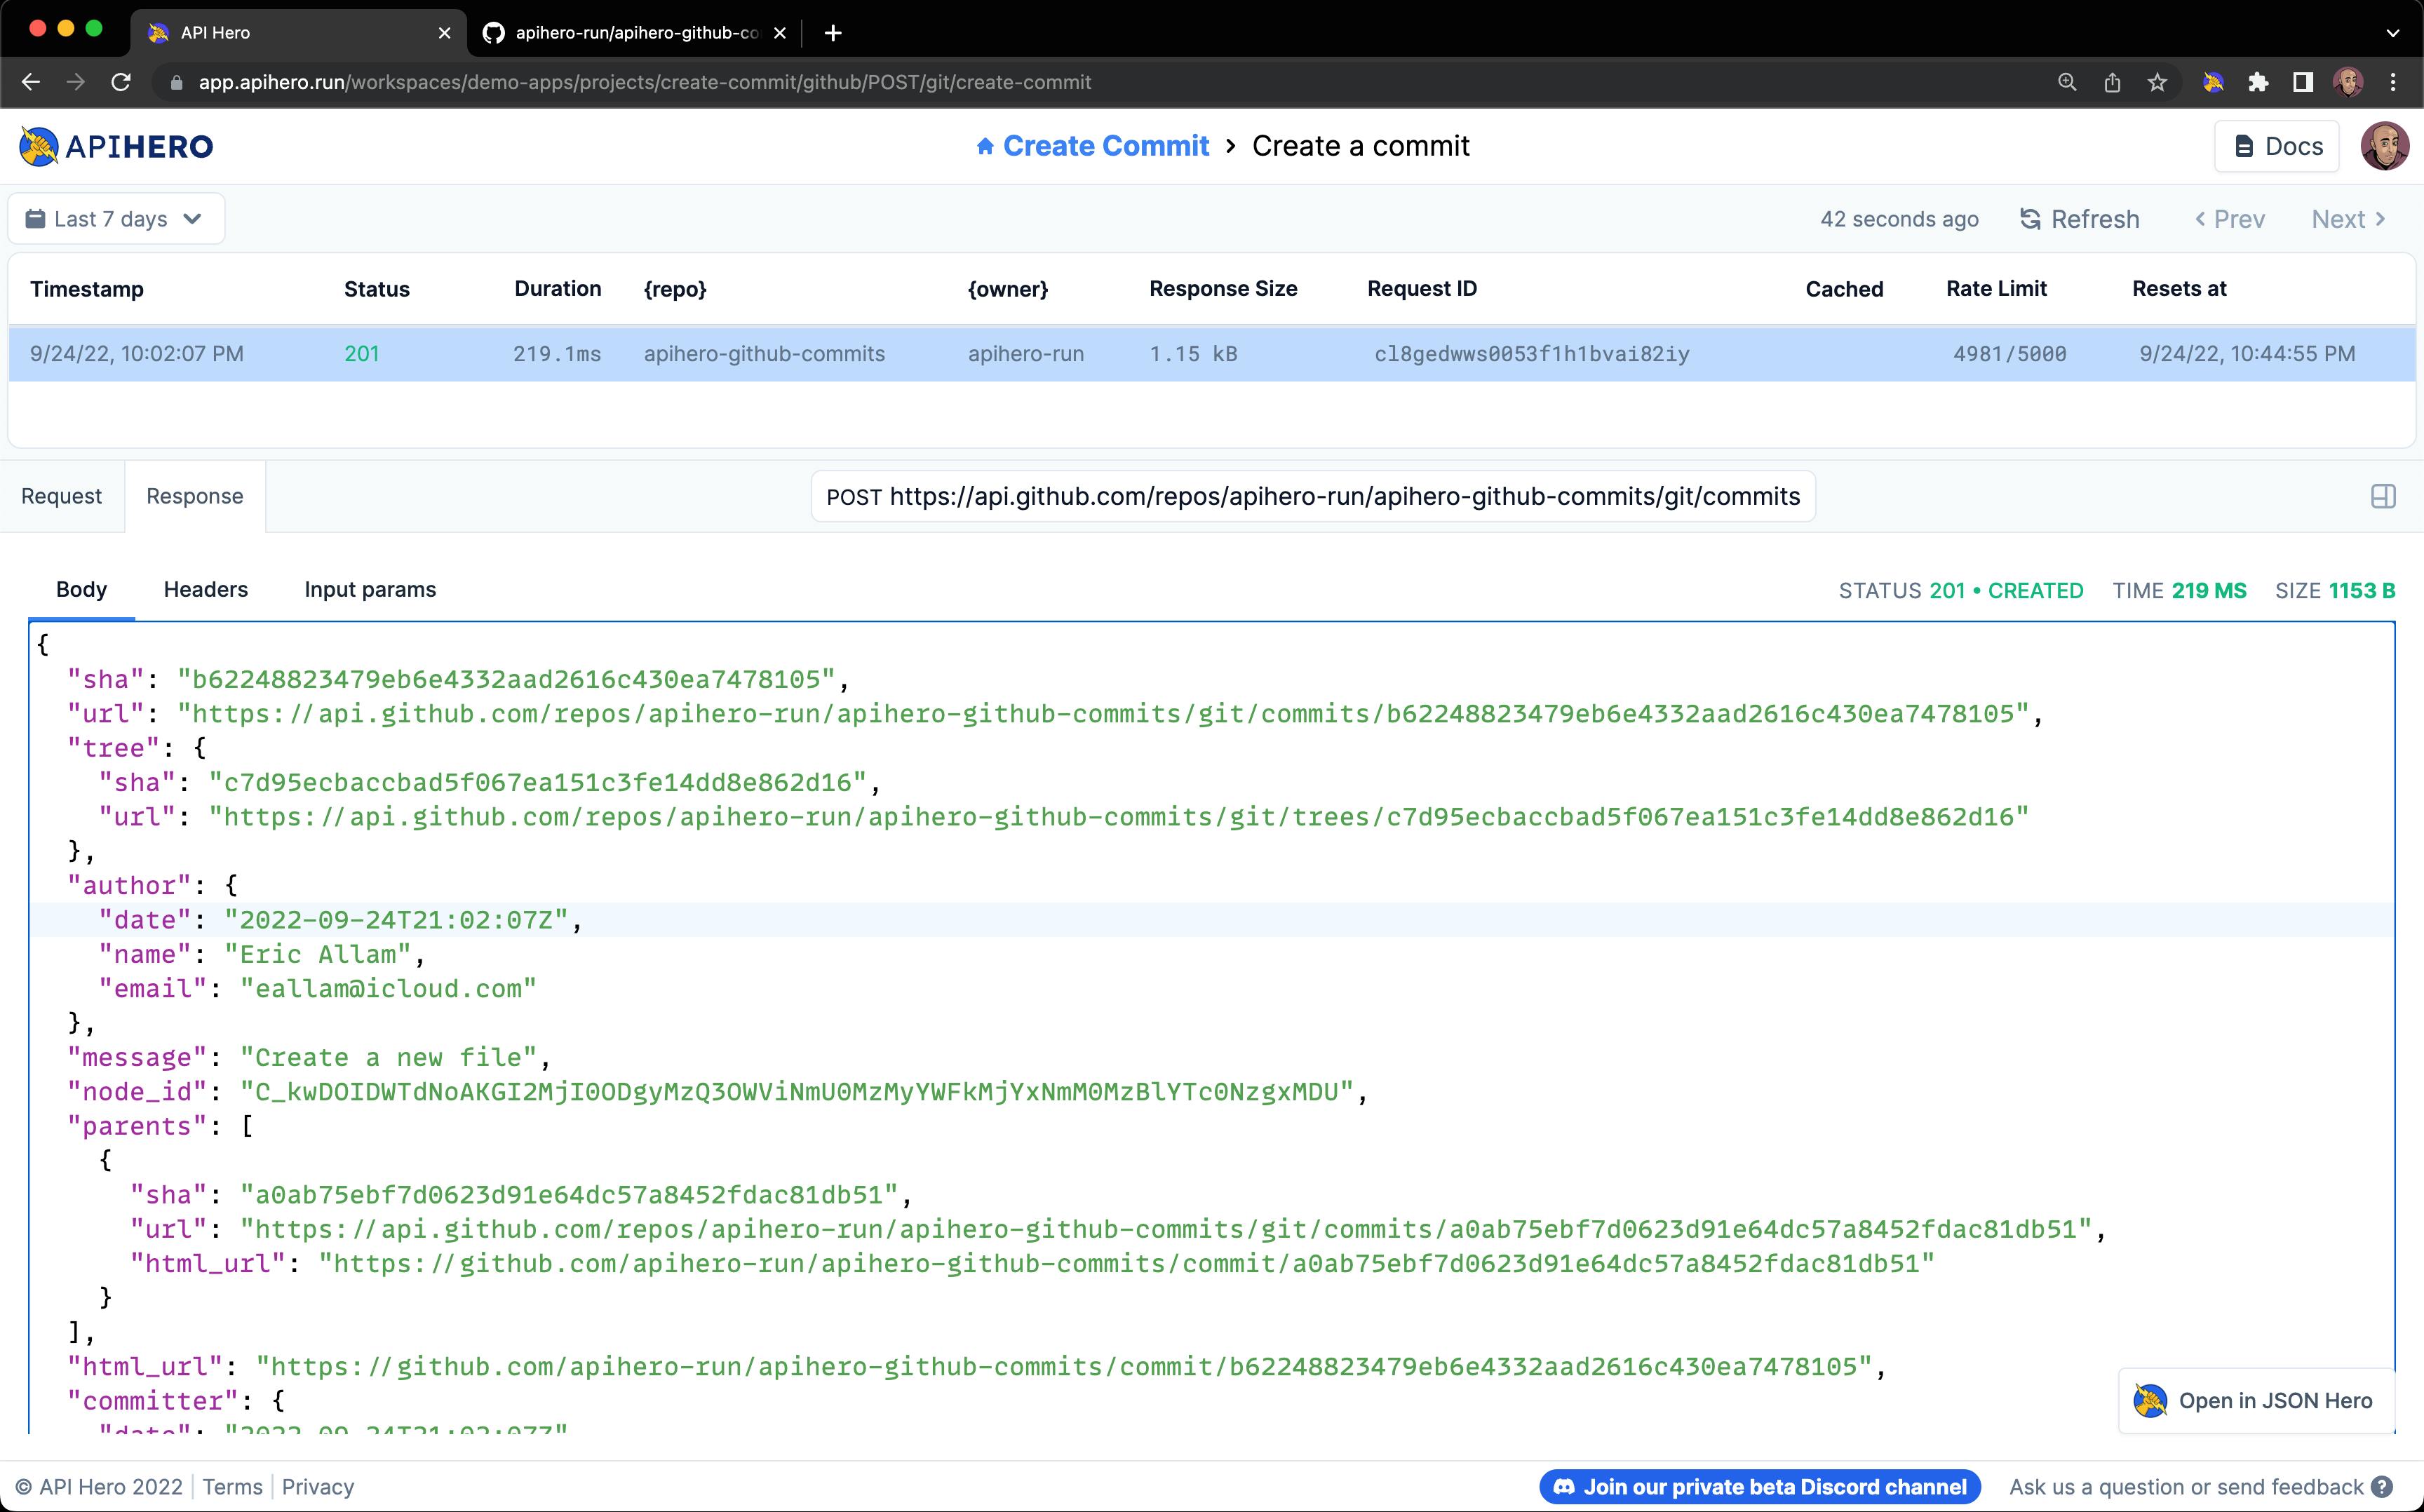
After running npm run dev again, you can see the request should have succeeded with another 201 created:
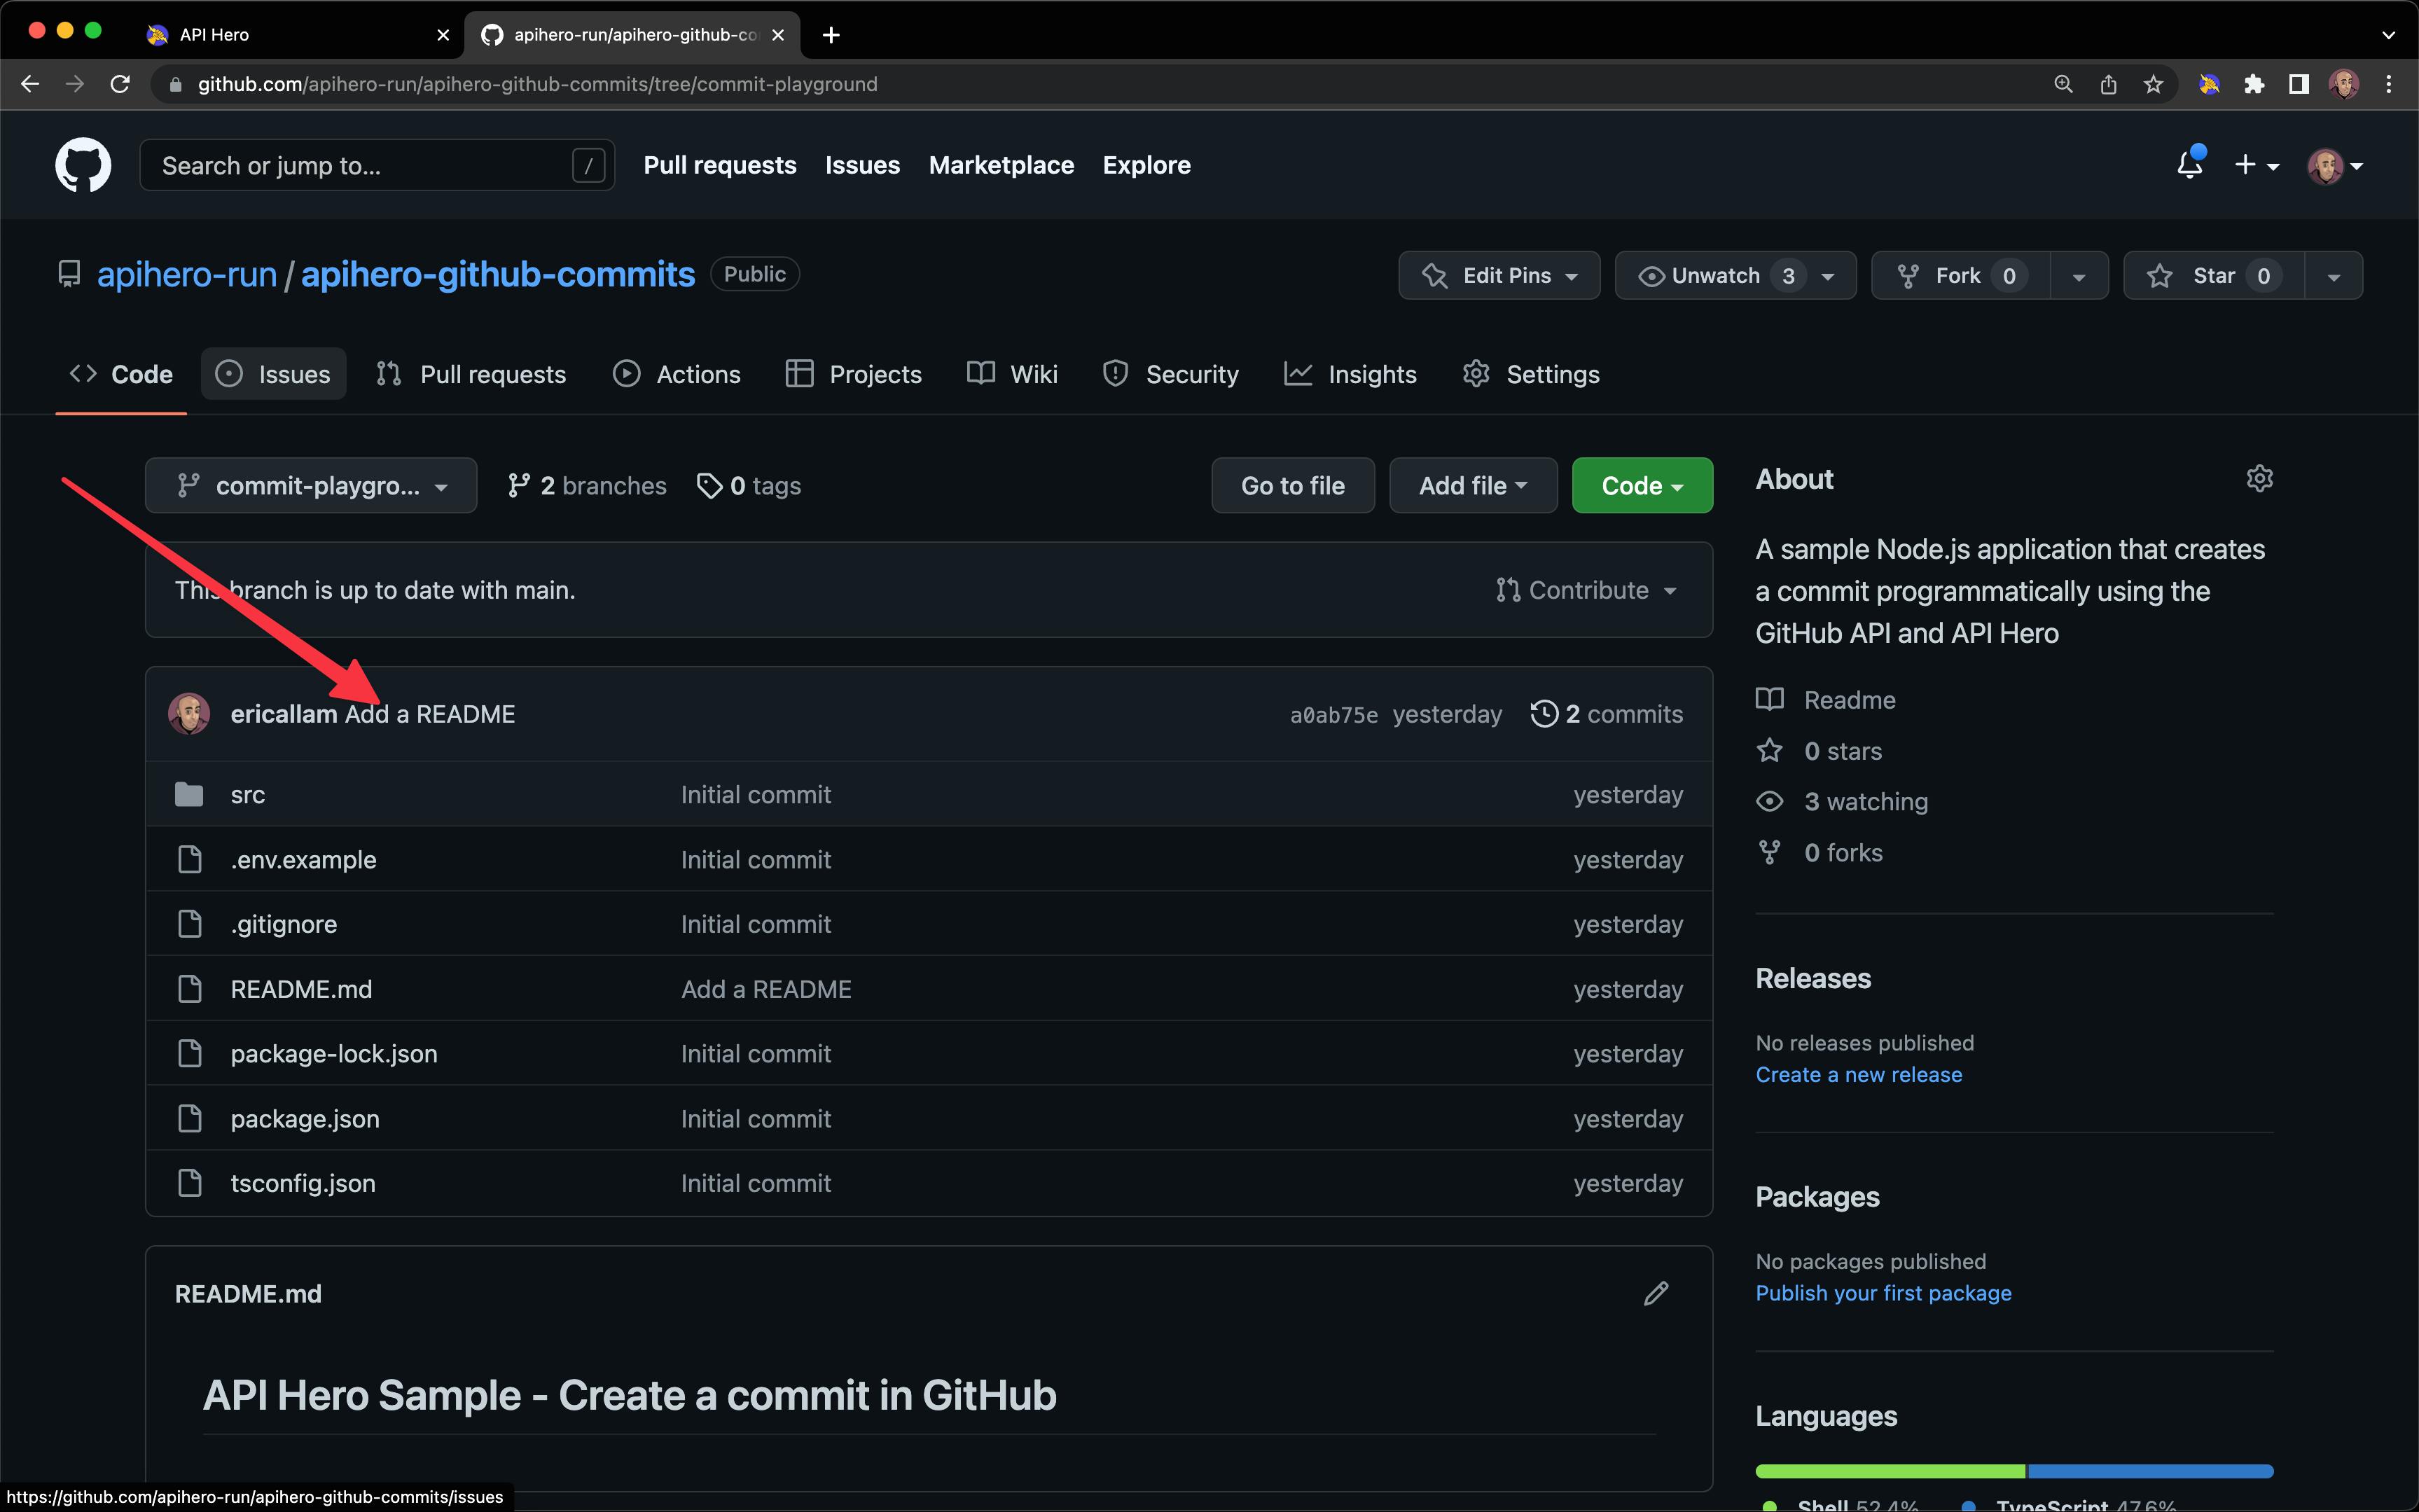
But if we head over to the GitHub repo's commit-playground branch, we can see that our commit isn't showing up:
4. Update the HEAD ref
That's because we have to do 1 more step before our commit is finalized: update the HEAD of the commit-playground branch to point to the new commit's sha, using the Update a reference endpoint:
async function createCommit(owner: string, repo: string, branch: string) {
  const ref = await fetchEndpoint(git.getRef, {
    owner,
    repo,
    ref: `heads/${branch}`,
  });

  if (ref.status === "error") {
    throw ref.error;
  }

  const commitTree = await fetchEndpoint(git.createTree, {
    owner,
    repo,
    tree: {
      tree: [
        {
          path: `playground/${Date.now()}.txt`,
          mode: "100644",
          type: "blob",
          content: `The time is ${new Date().toISOString()}`,
        },
      ],
      base_tree: ref.body.object.sha,
    },
  });

  if (commitTree.status === "error") {
    throw commitTree.error;
  }

  const commit = await fetchEndpoint(git.createCommit, {
    owner,
    repo,
    commit: {
      message: "Create a new file",
      tree: commitTree.body.sha,
      parents: [ref.body.object.sha],
    },
  });

  if (commit.status === "error") {
    throw commit.error;
  }

  const updatedRef = await fetchEndpoint(git.updateRef, {
    owner,
    repo,
    ref: `heads/${branch}`,
    payload: {
      sha: commit.body.sha,
    },
  });
}
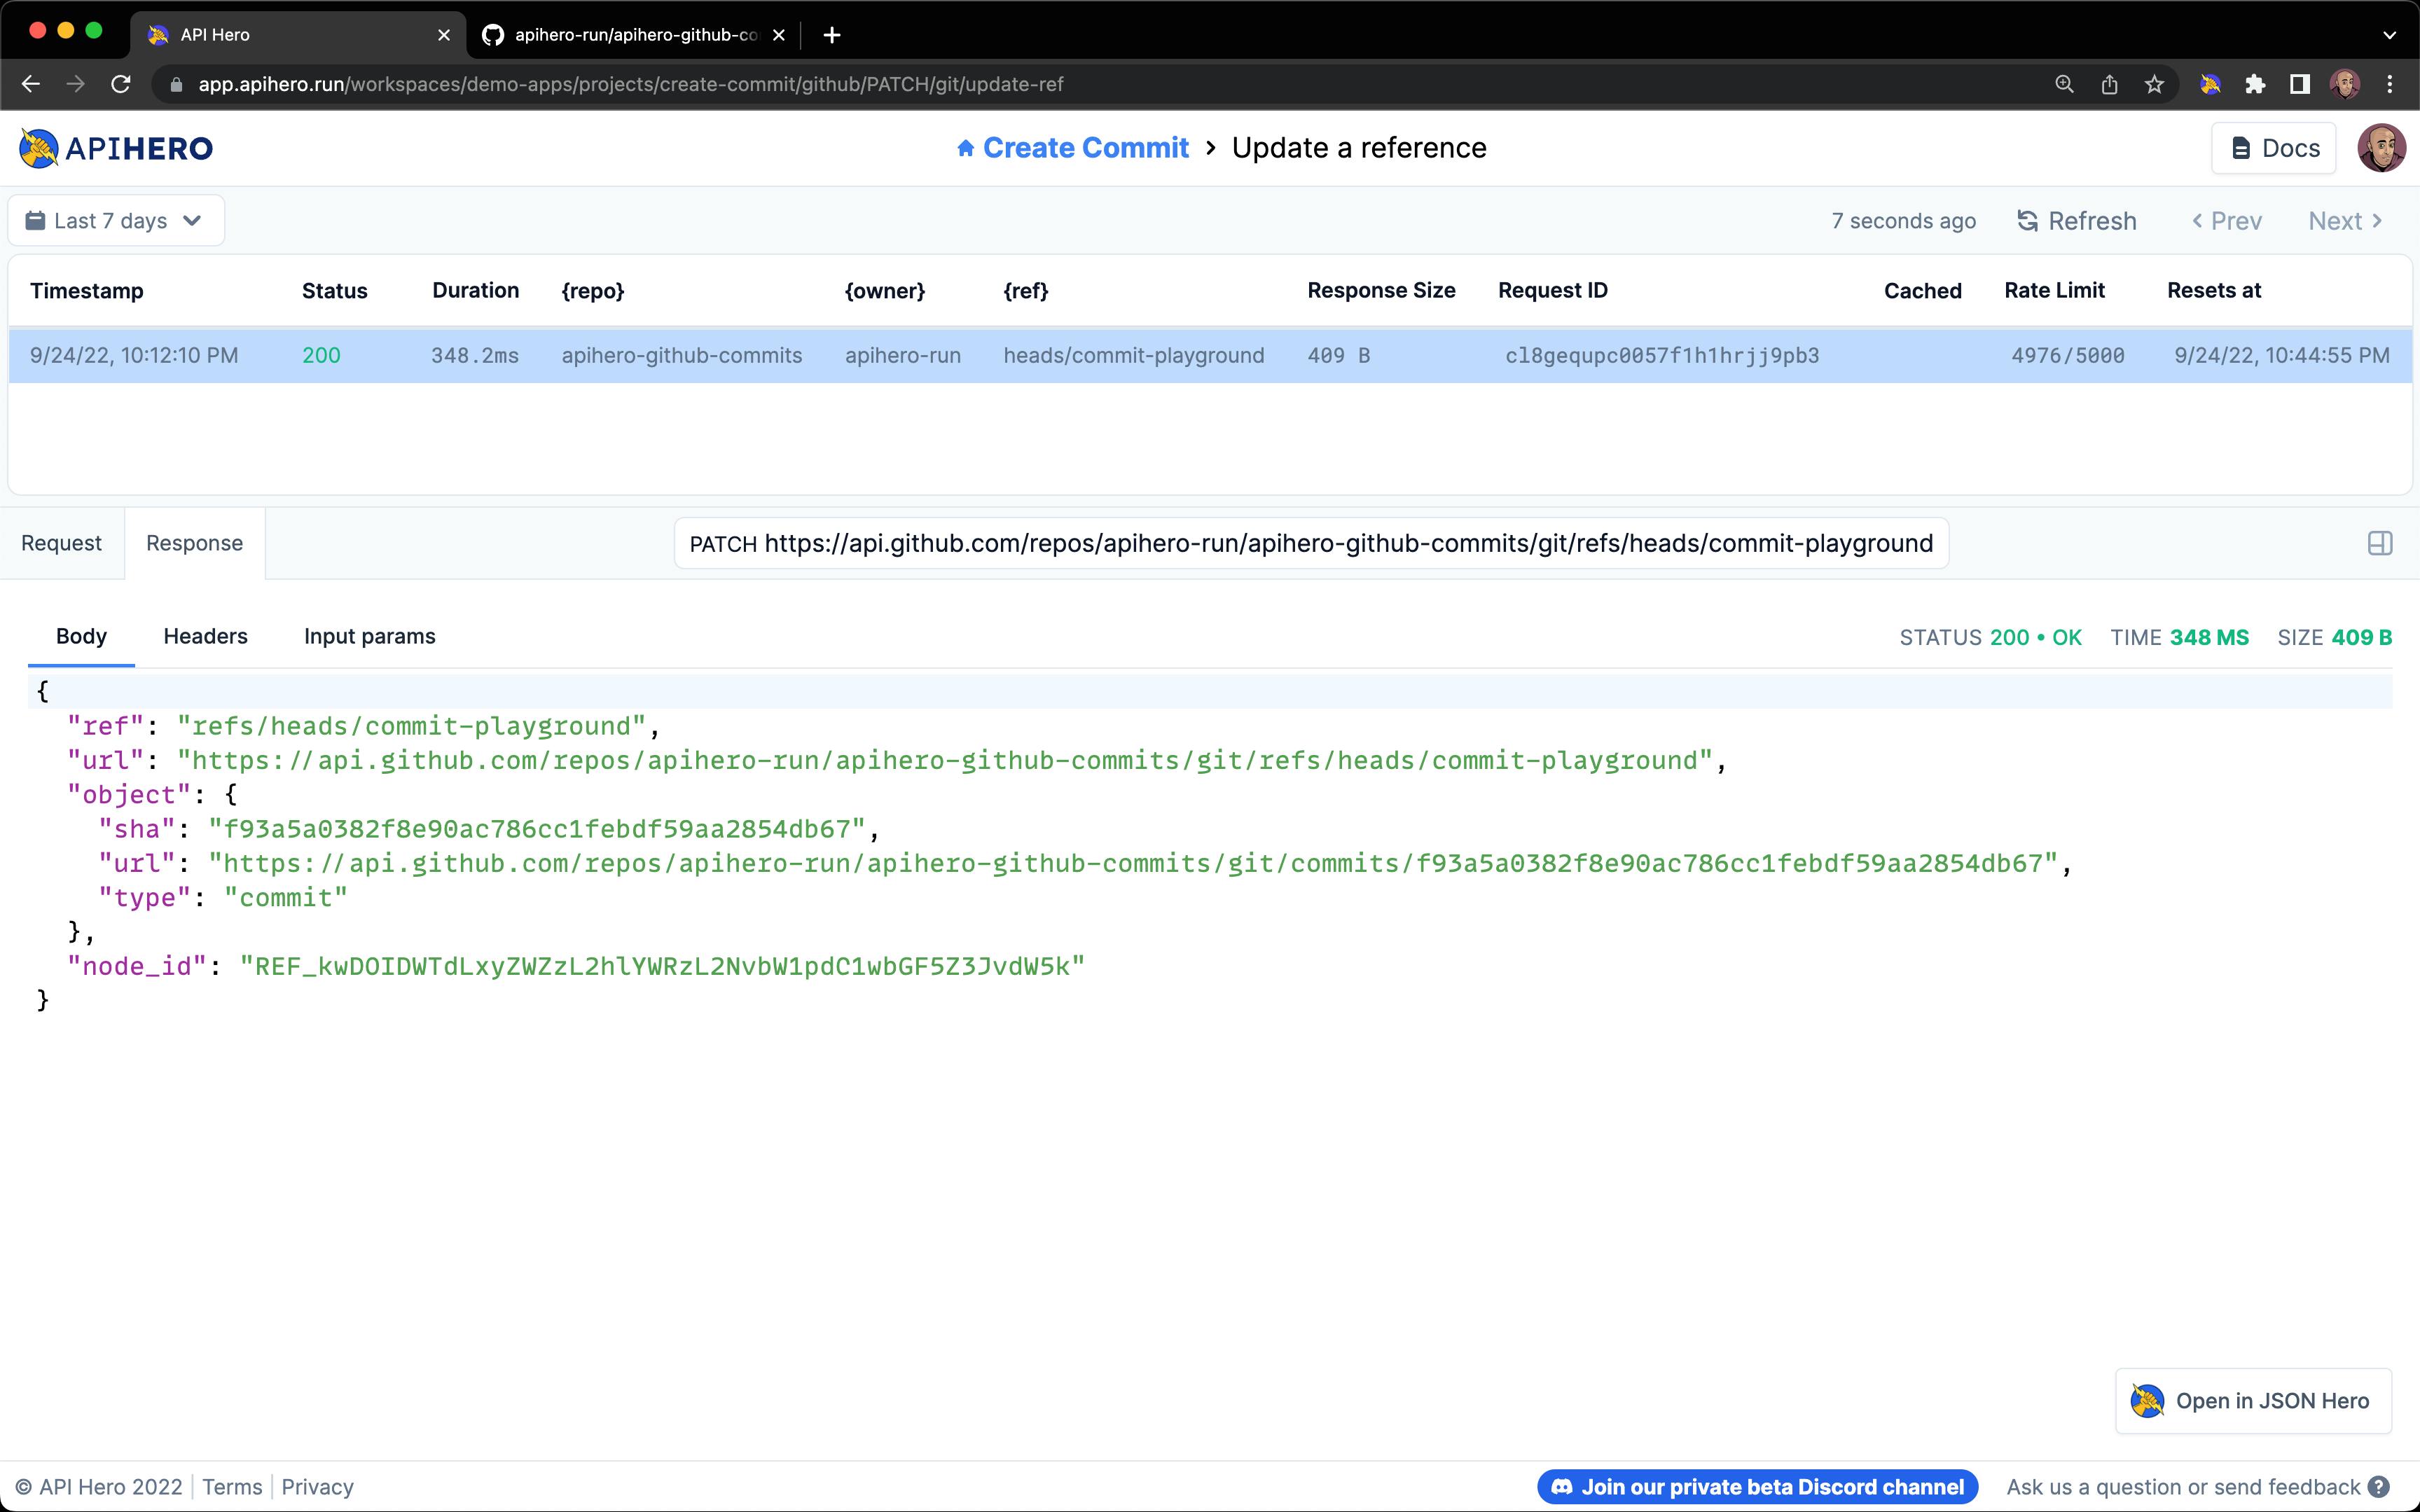
After running npm run dev again, we should see the request to update the ref in the Request History:
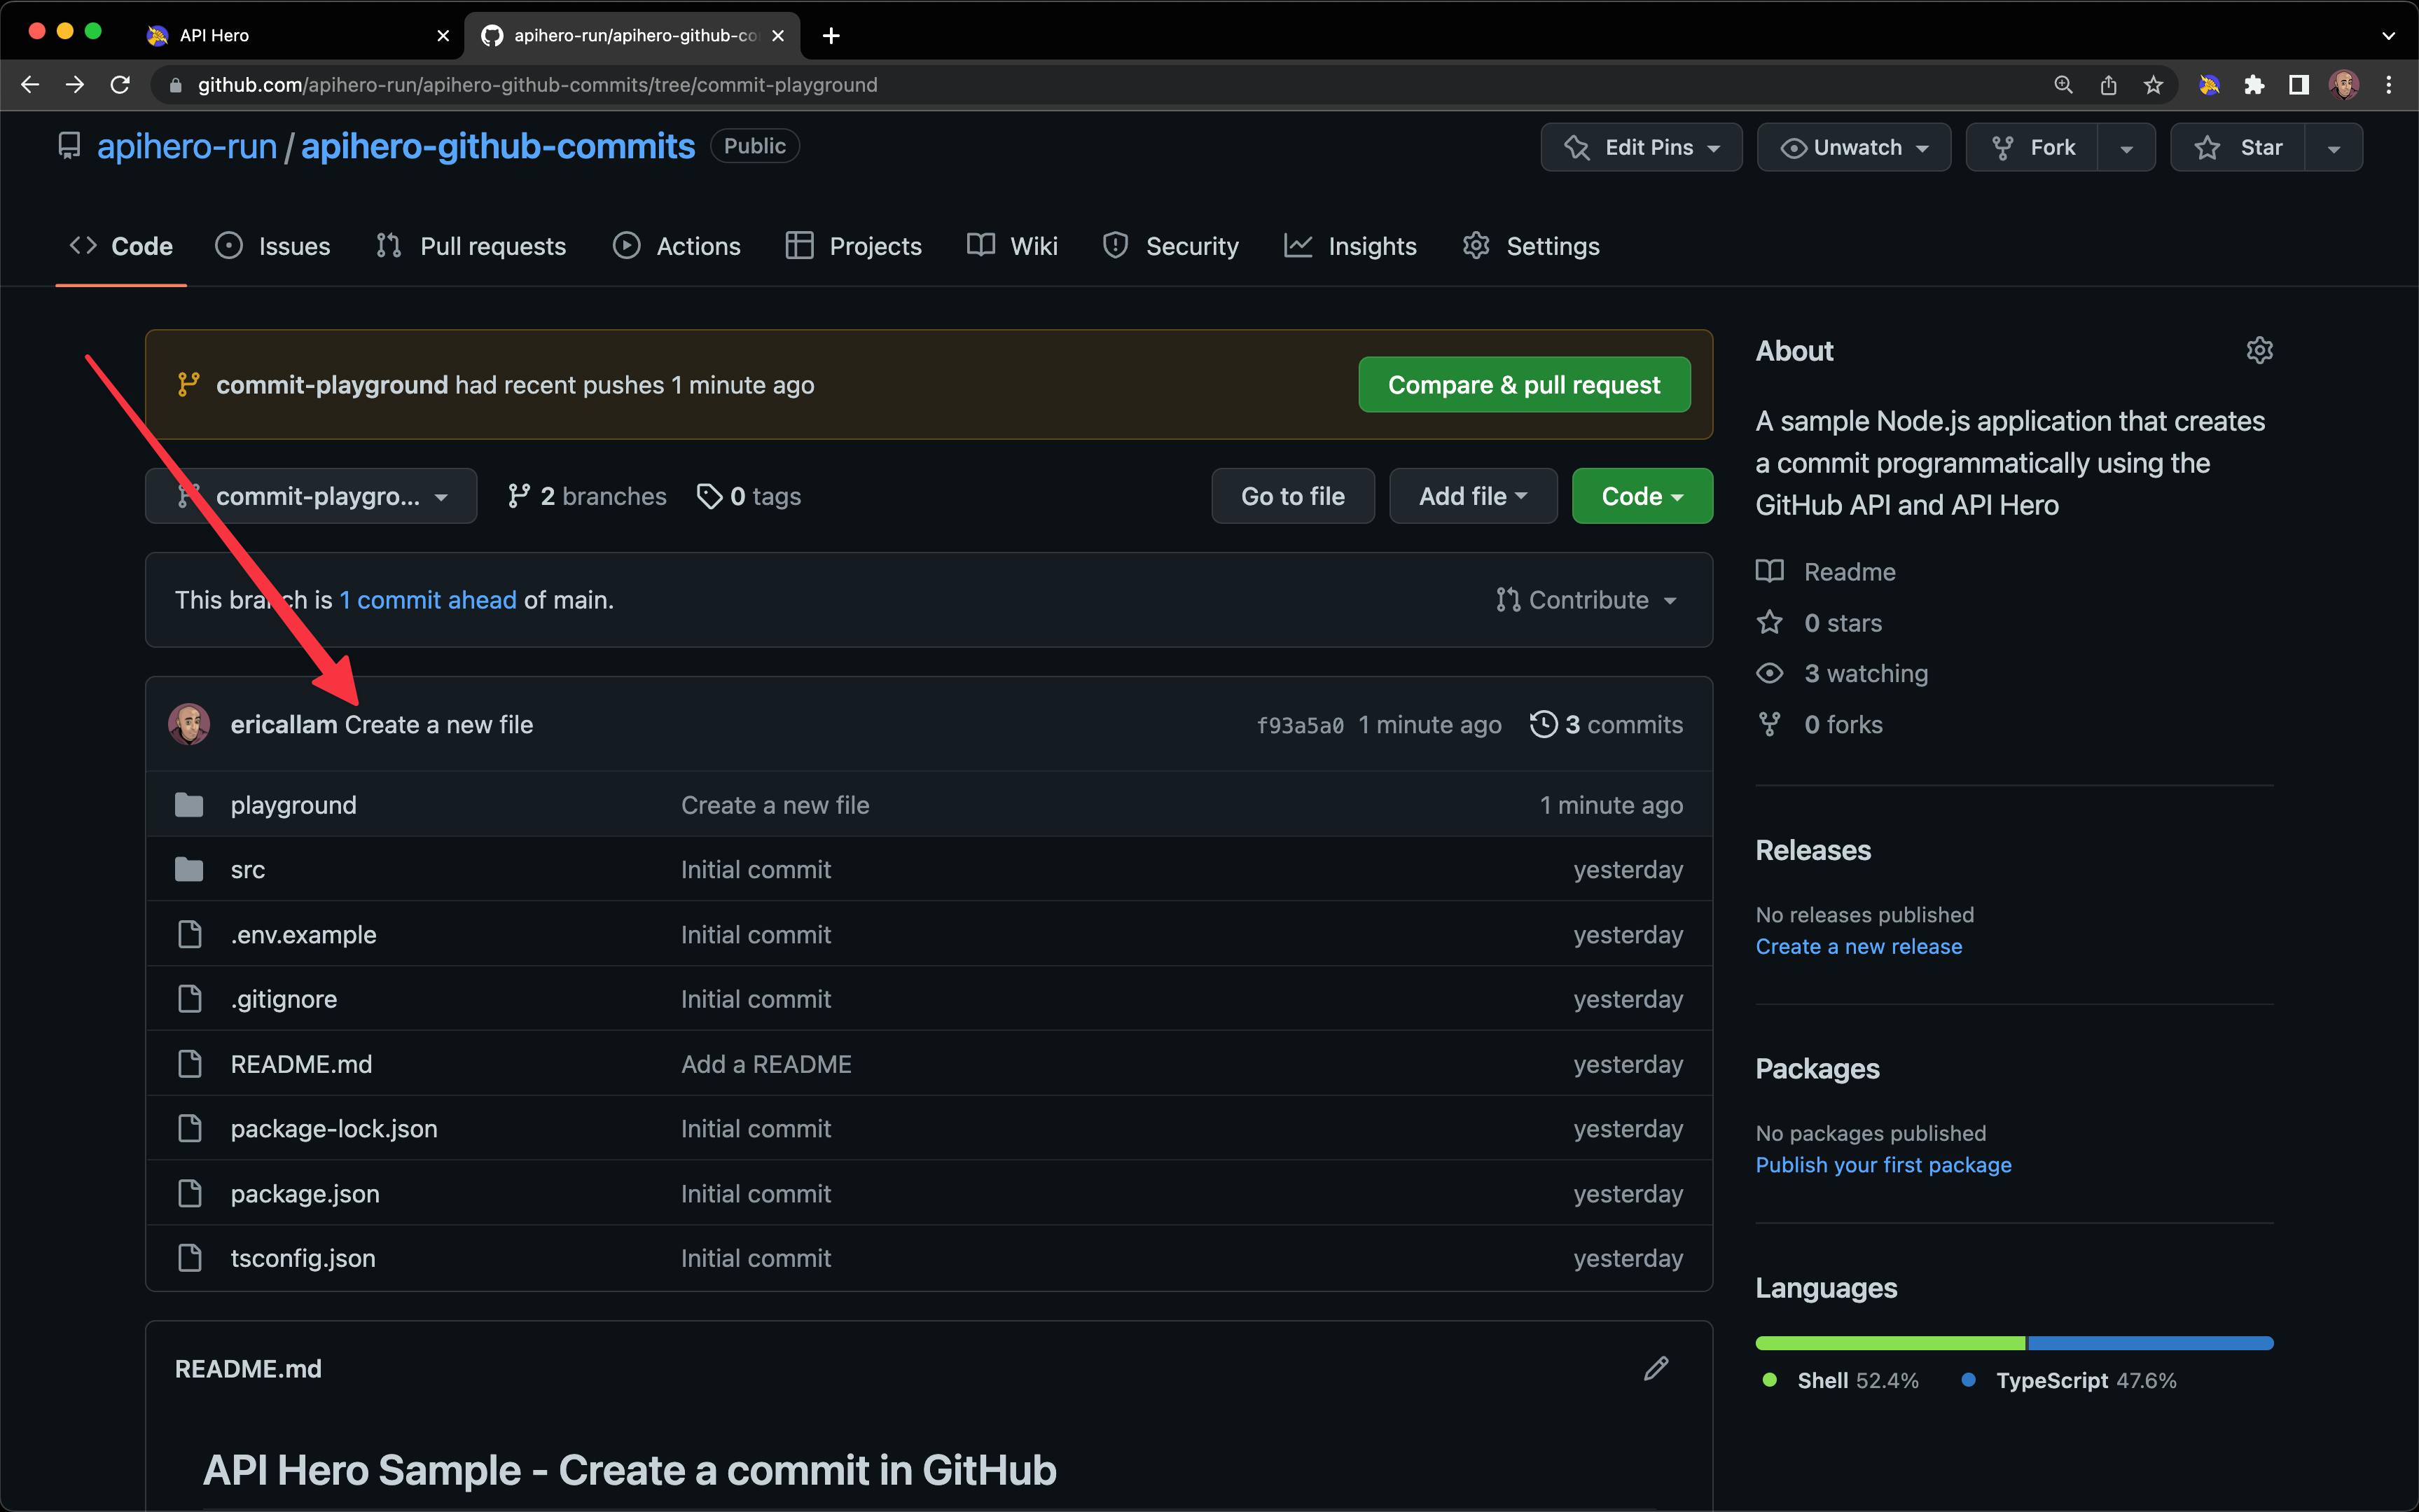
And then heading back over to the repo on GitHub should show the new commit (as well as the new file:
Wrap up
Create a commit in GitHub programmatically can be extremely useful, especially for automating devops tasks or when generating code. In fact, API Hero internally does this exact thing for when we release a new integration package (like the @apihero/github one we just used).
If you have any questions or feedback, please hop in to our discord channel or feel free to email me @ eric@apihero.run.
